Delegating Tokens with a Block Explorer
Introduction
This tutorial covers how to delegate Casper tokens to a validator on the network.
Casper and other Proof-of-Stake protocols allow token holders to earn rewards and participate in the protocol through a mechanism called delegation or staking. We will use these terms interchangeably in this guide. See the Staking Key Concepts page for more details about the differences.
Prerequisites
- To stake tokens with a validator, you must create an account with CSPR tokens in its main purse. One option is to use the Casper Wallet by following the Getting Started user guide.
- You need to fund the account's main purse to delegate tokens.
- Connect to a block explorer to set up the delegation. This guide uses cspr.live and the Casper Wallet.
- Review your account before starting the process.
- Review the current delegation fees and ensure you have extra CSPR in your account's main purse apart from the amount you are delegating. Otherwise, the delegation might fail.
Reviewing your Account
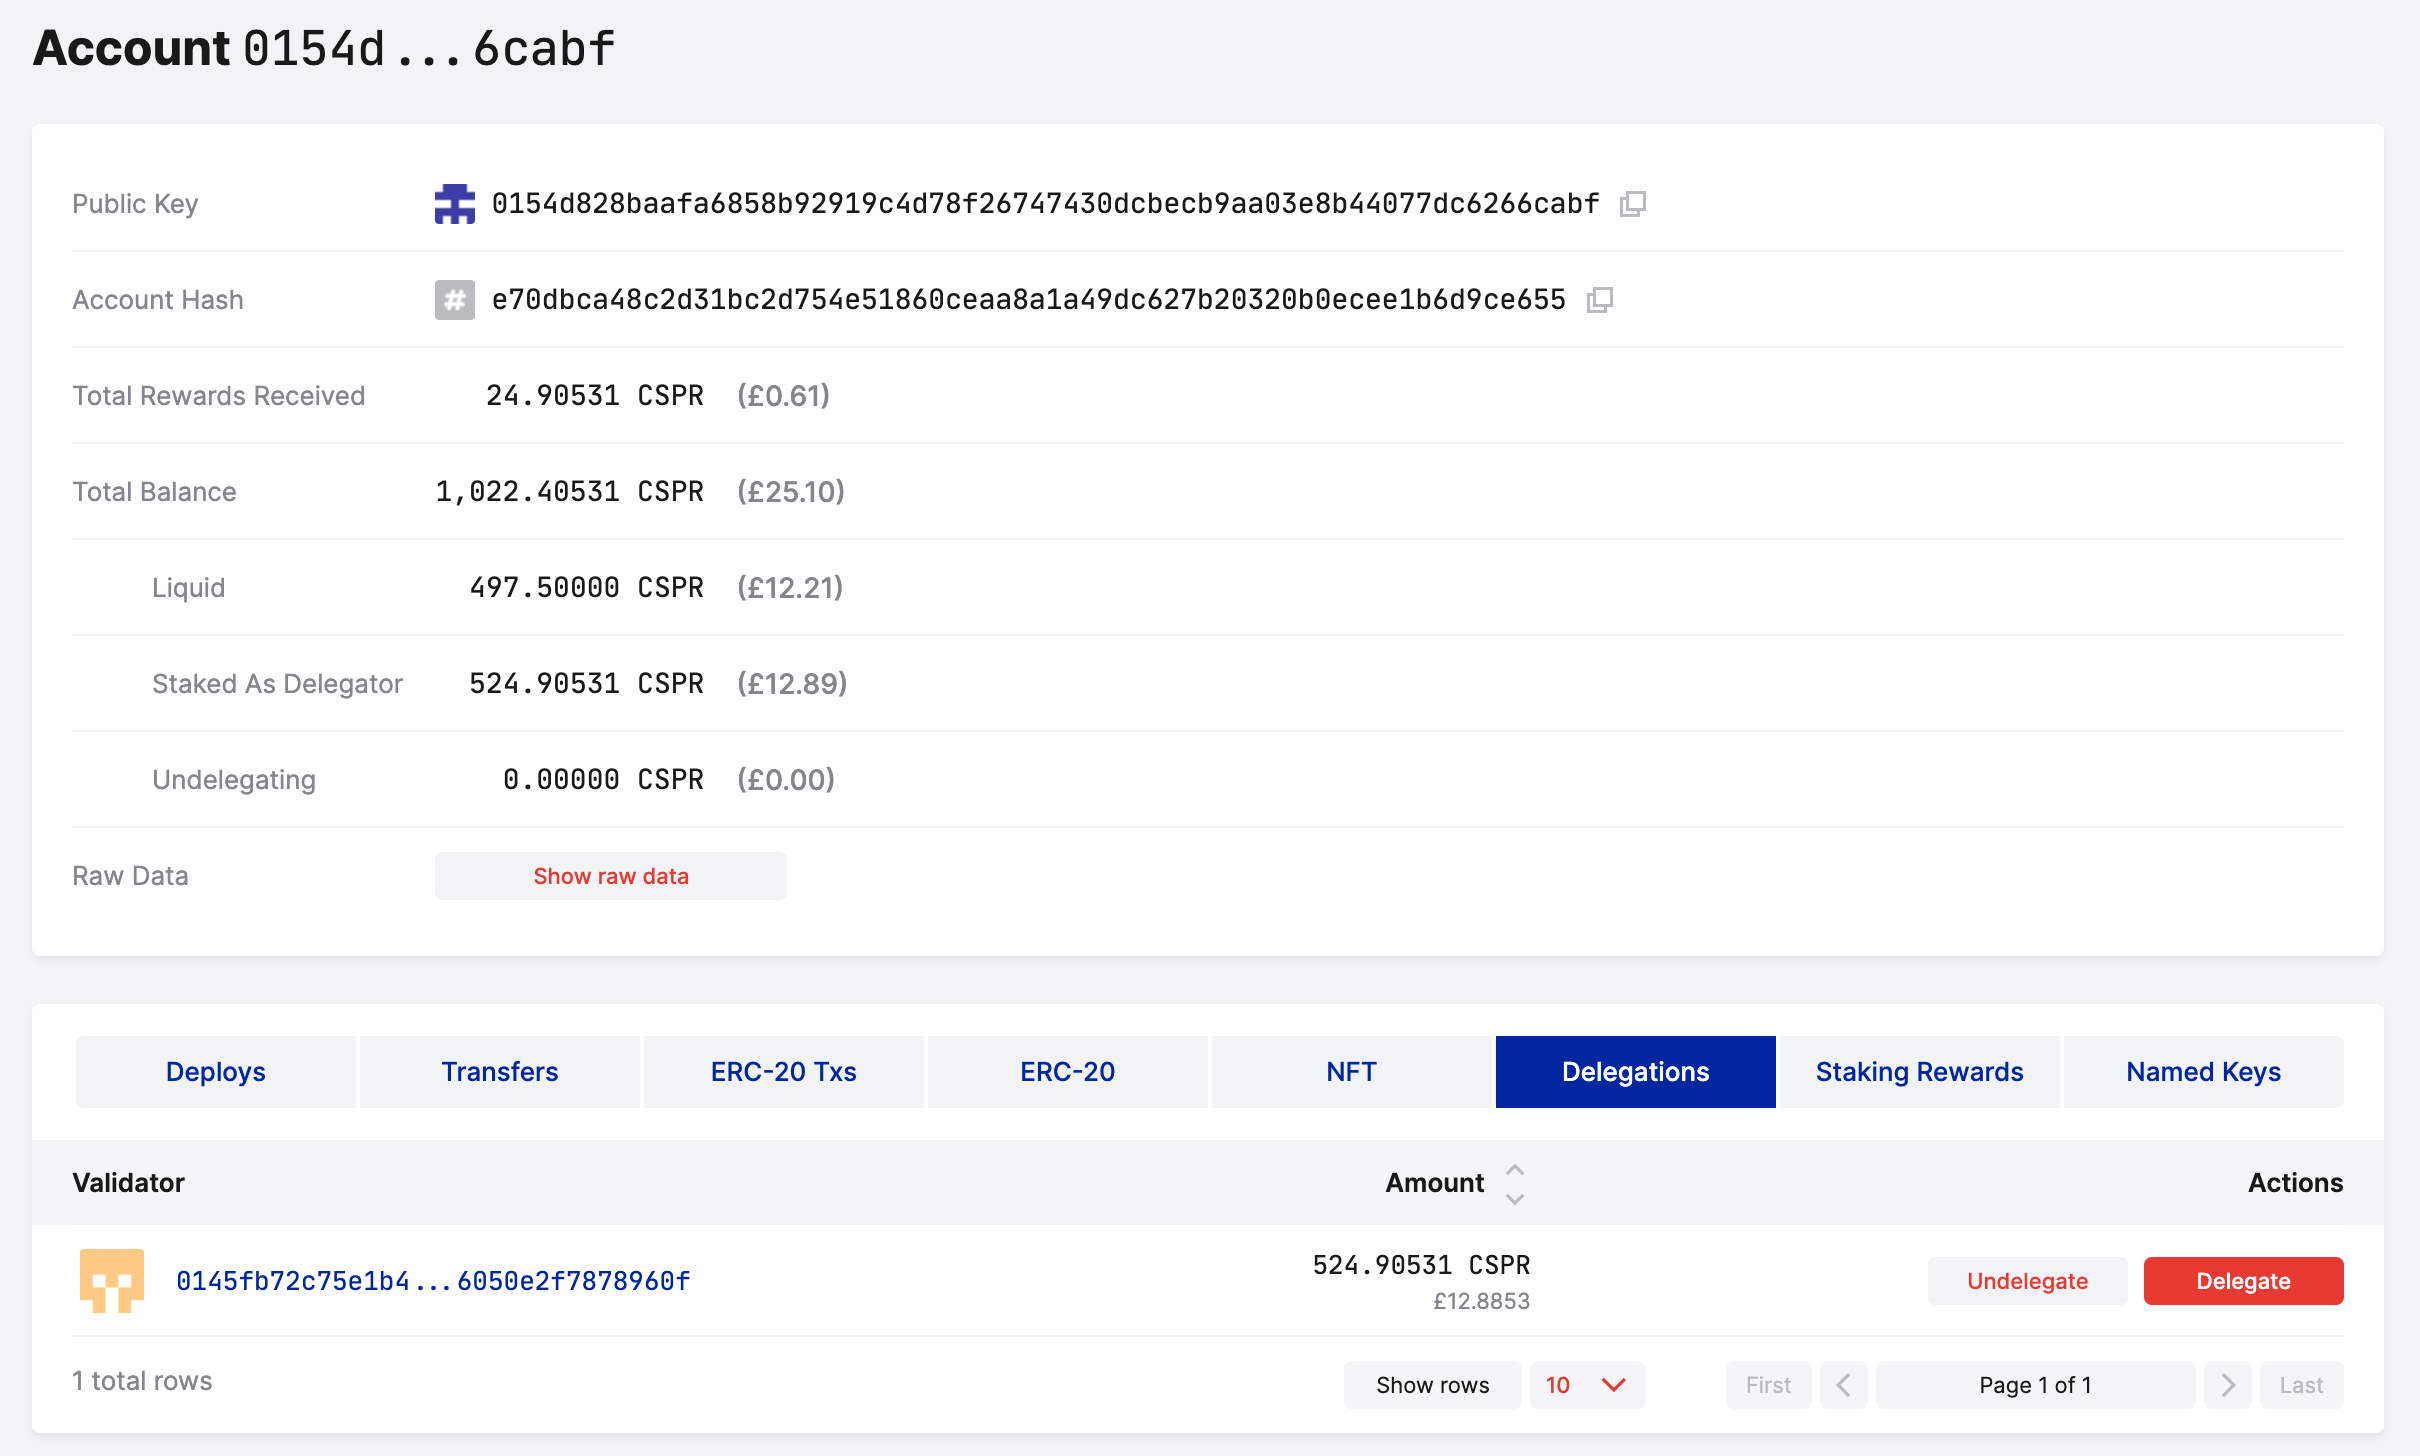
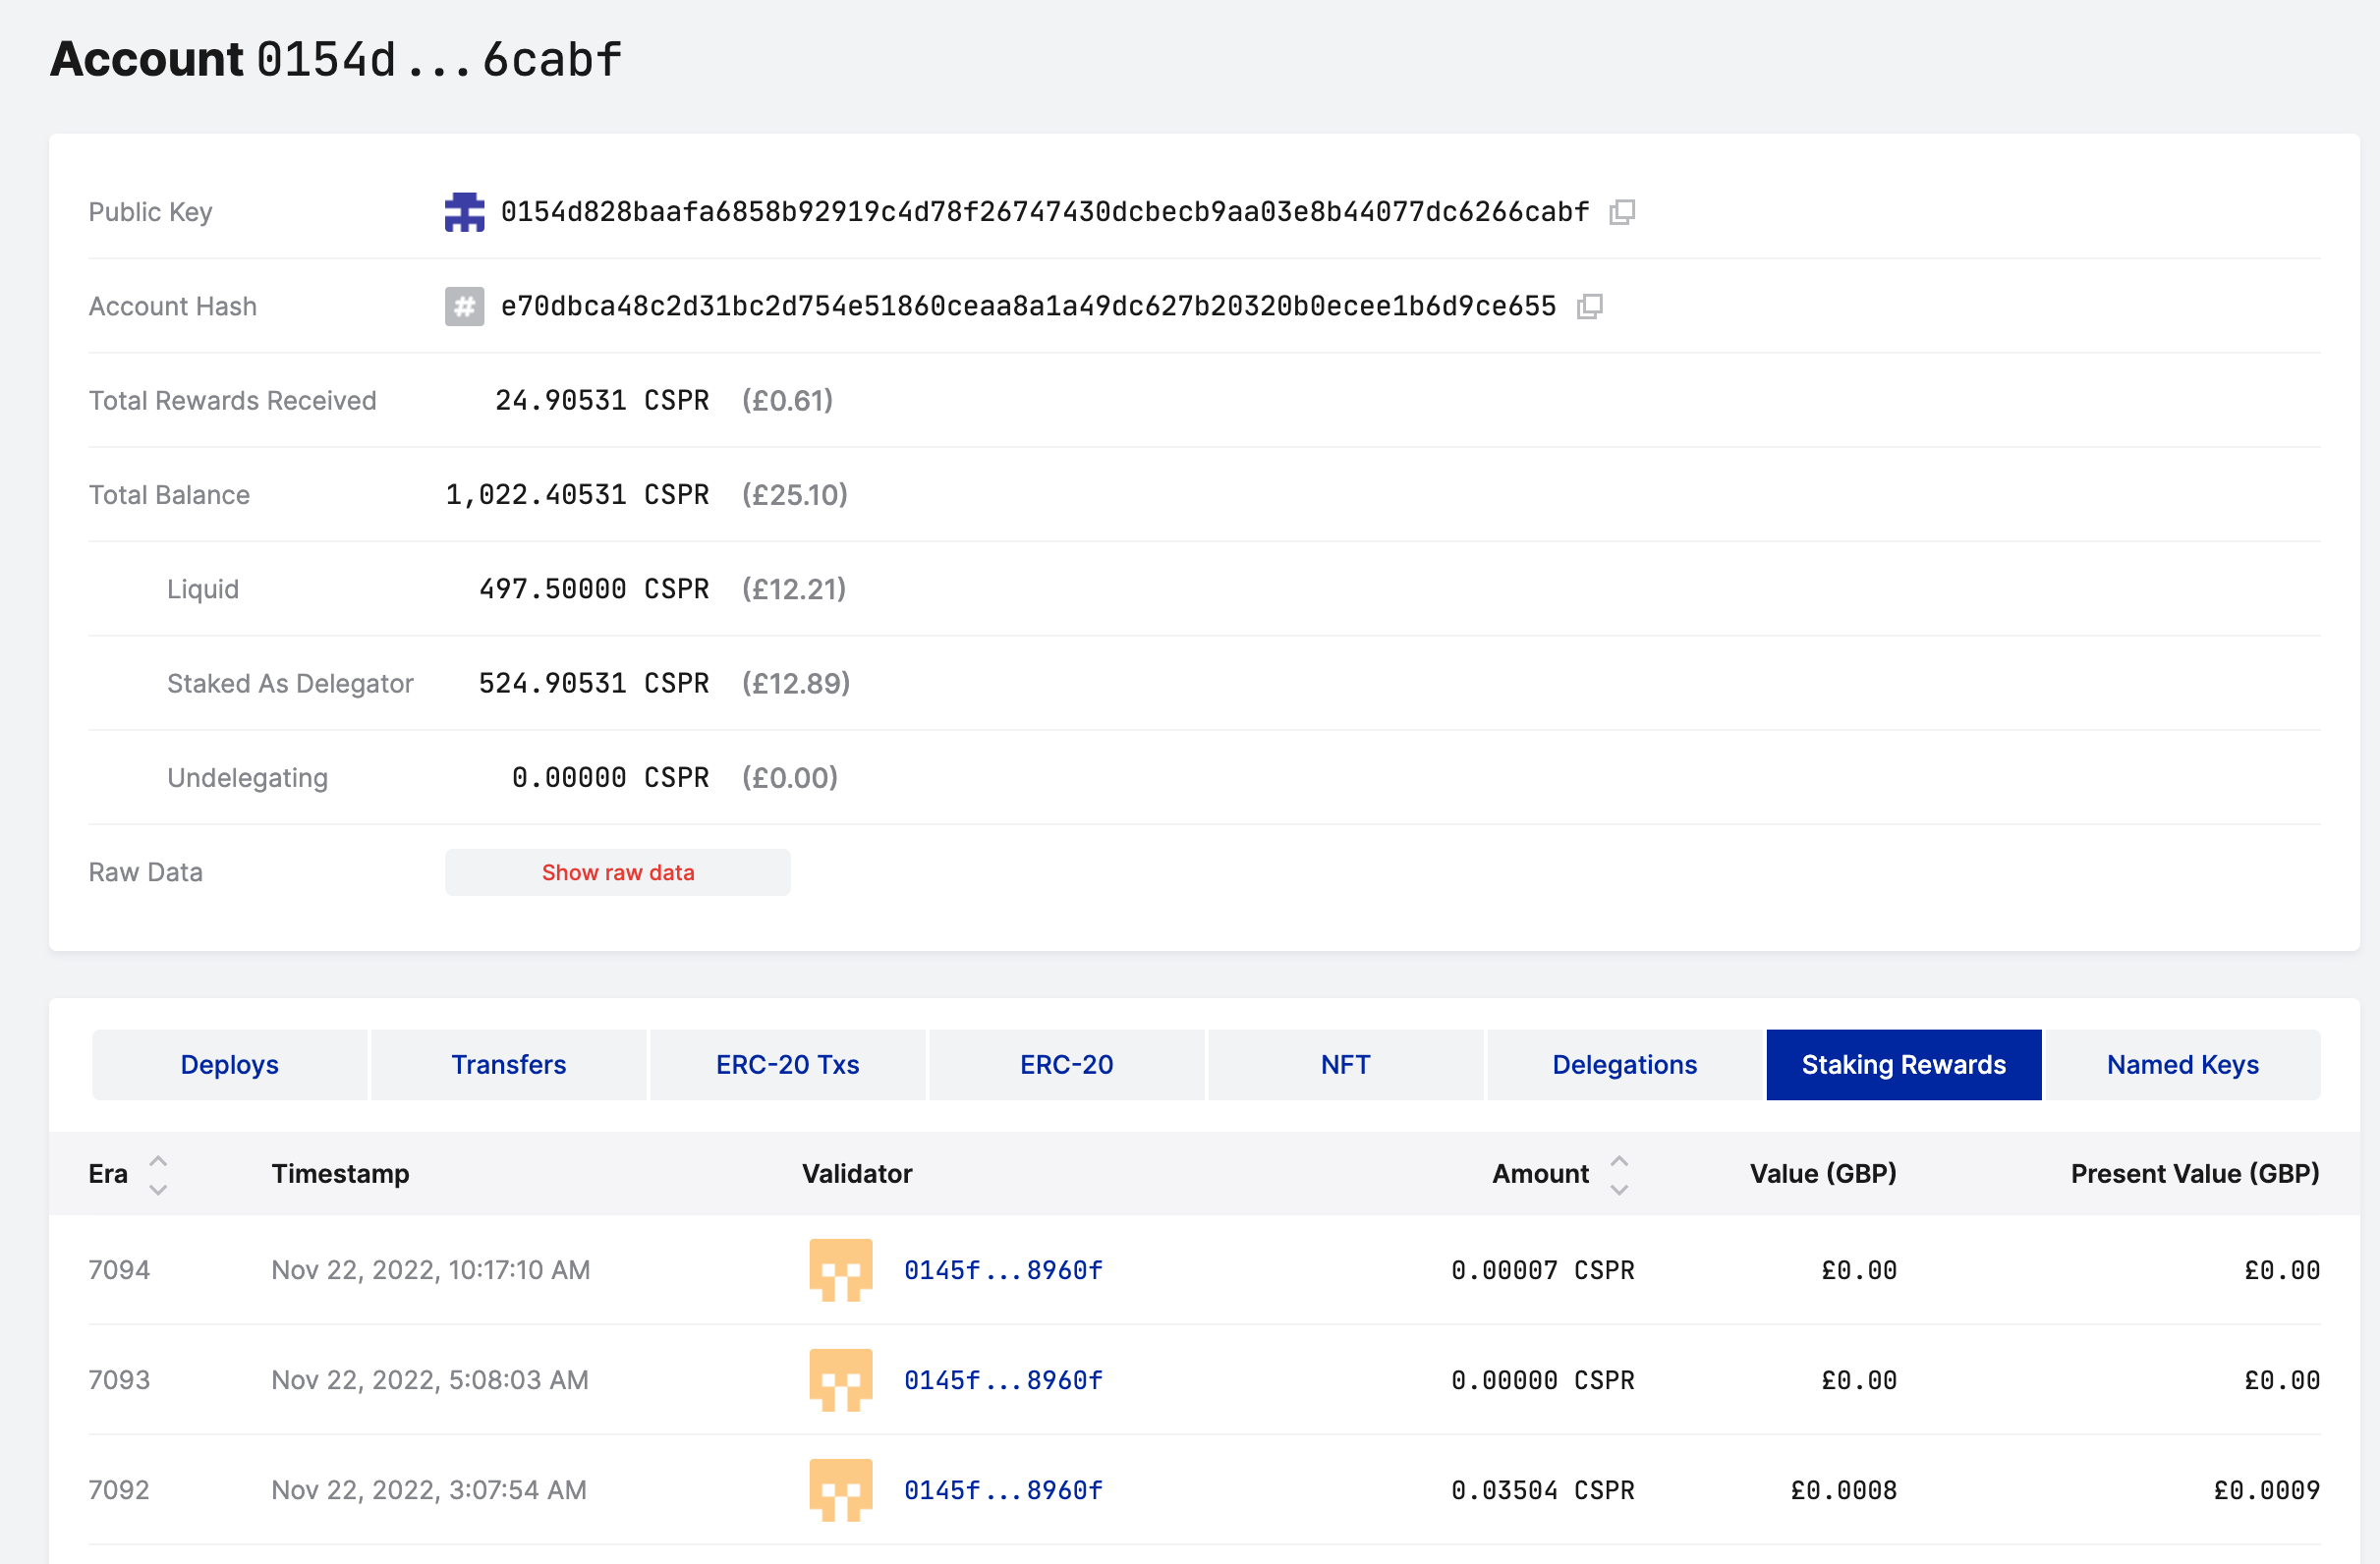
Once connected to the Casper blockchain, we recommend reviewing the active account you wish to use for delegating tokens, especially these fields:
- The Liquid Account Balance, representing the tokens you have for immediate use
- The Delegated Account Balance, representing the delegated tokens already staked with validators on the network
- The Delegations tab, listing the validators to whom you have delegated tokens
- The Staking Rewards tab, showing the rewards received in each era
Accessing the Delegation Feature
You can access the delegation functionality in two ways.
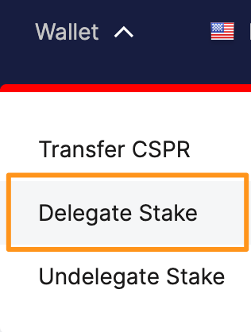
Option 1: Click Wallet from the top navigation menu and then click Delegate. In the next screen, you will need to specify the validator's public key or search for a validator.
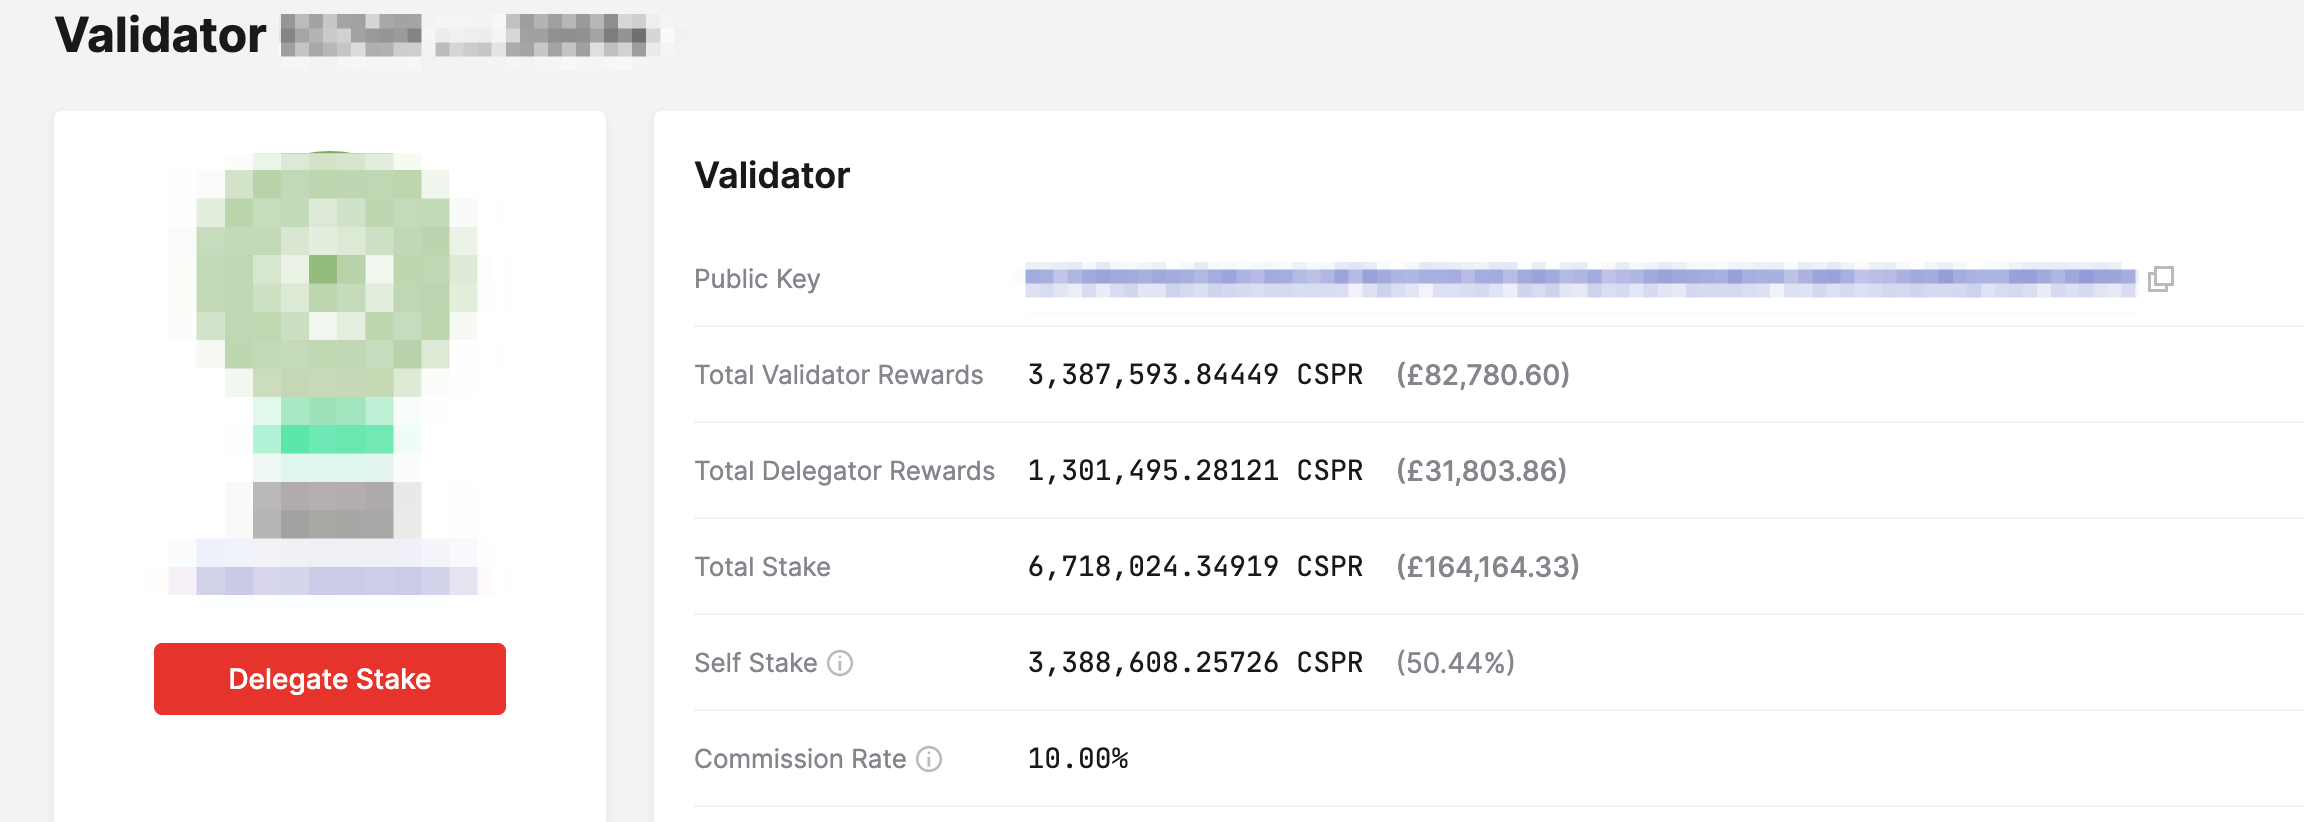
Option 2: Click Validators from the top navigation menu. From the validators table, click on any validator to access their details. Once you find the validator to whom you want to delegate tokens, click the Delegate button. The next screen will have the validator's public key pre-populated.
Stepping through the Delegation Process
The following instructions will take you through the delegation process, starting with the "Delegation details" screen.
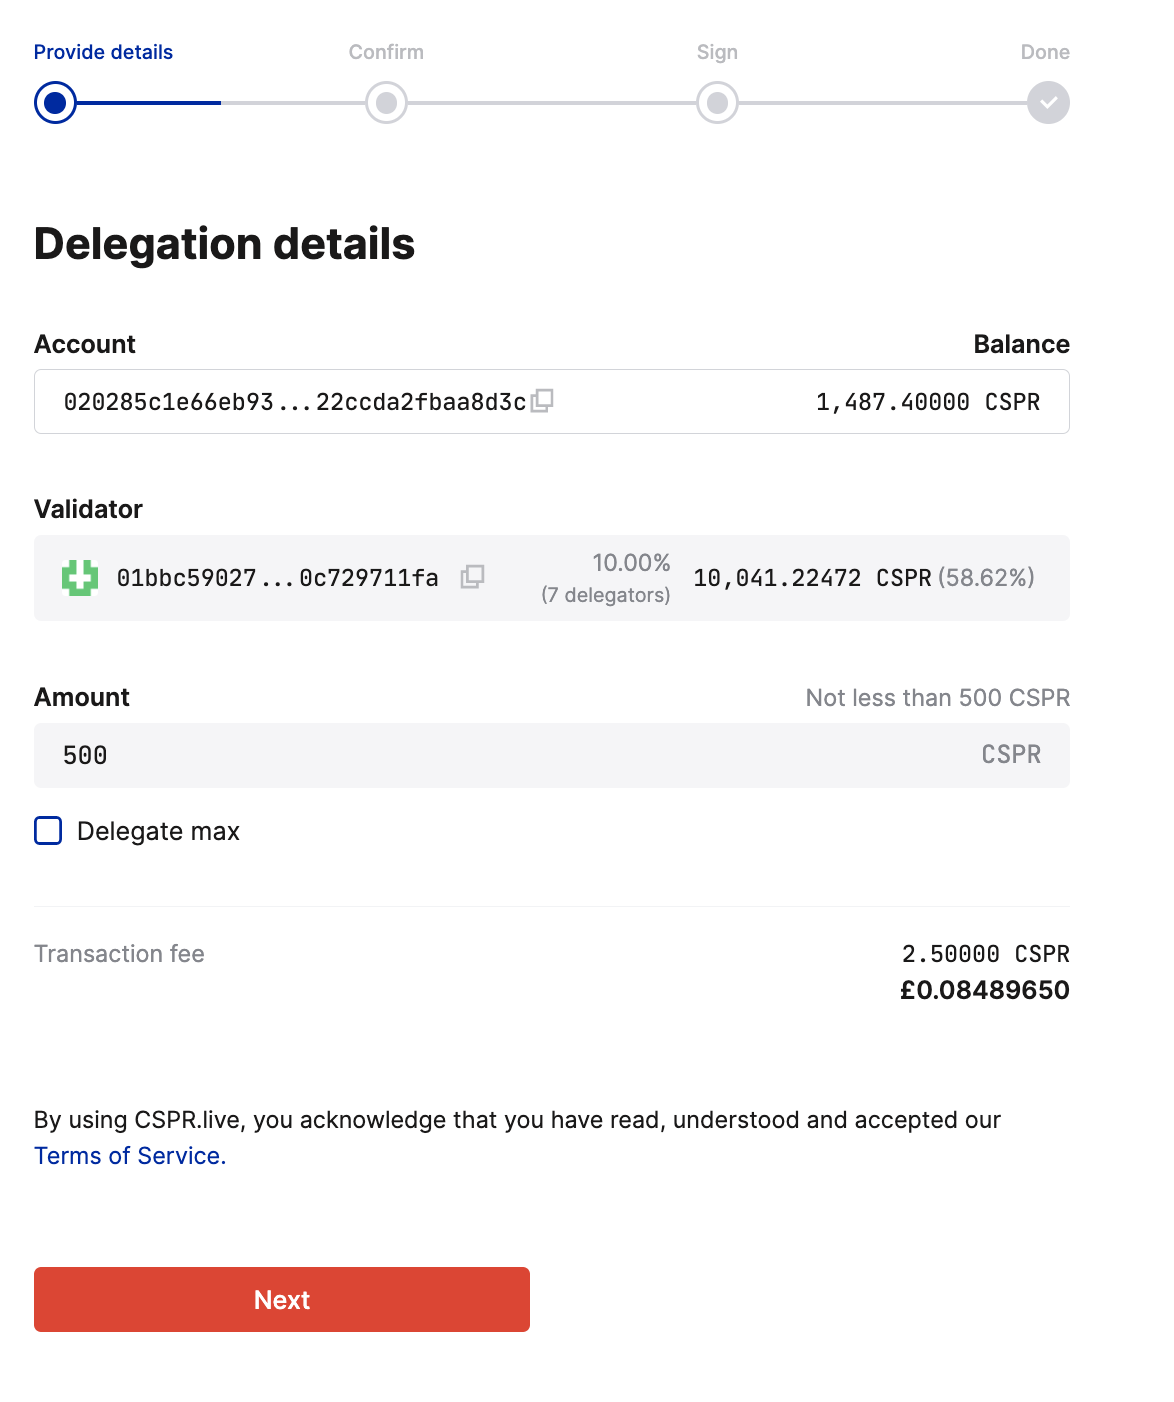
Step 1 - Delegation details
- Specify the validator's public key if you have reached this screen using the Wallet drop-down menu. Otherwise, verify the pre-populated key in the Validator field.
- Enter the amount of CSPR you wish to delegate. Remember to account for the delegation fee.
- Click Next.
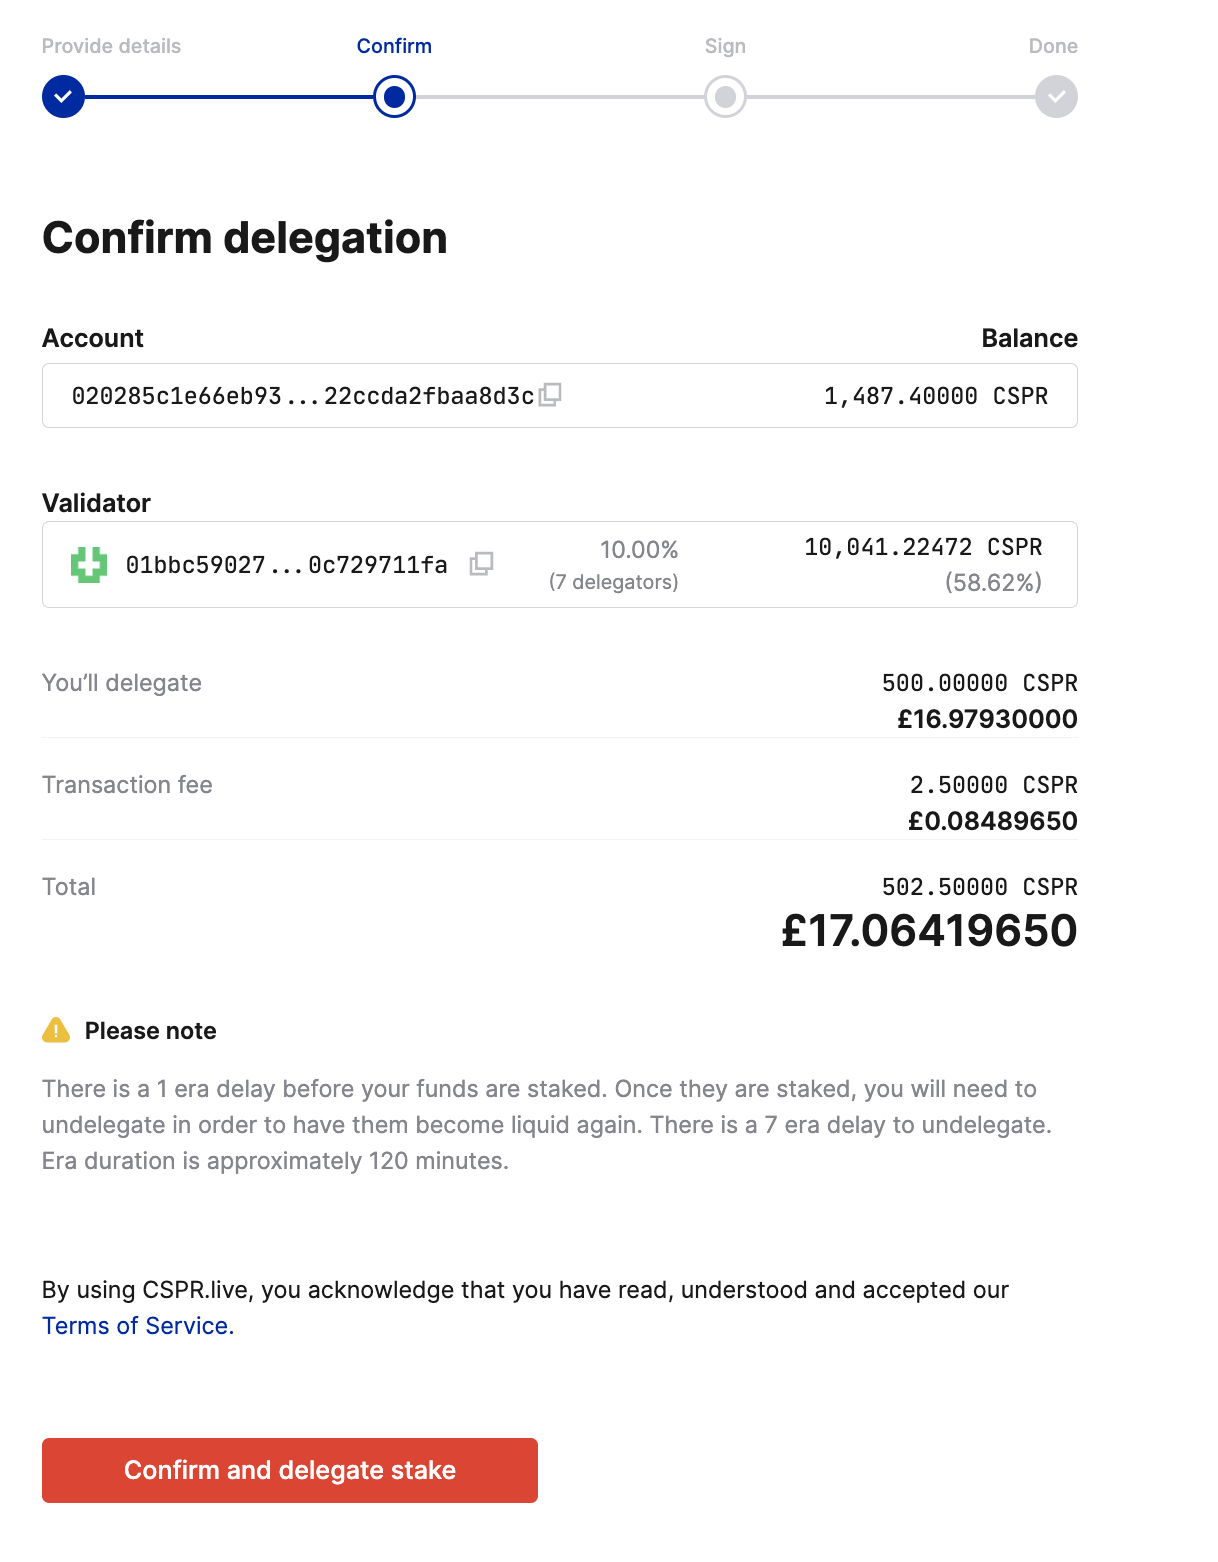
Step 2 - Confirm the delegation
- Review the delegation details.
- If everything is correct, click Confirm and delegate stake. If you wish to make changes, return to the previous screen.
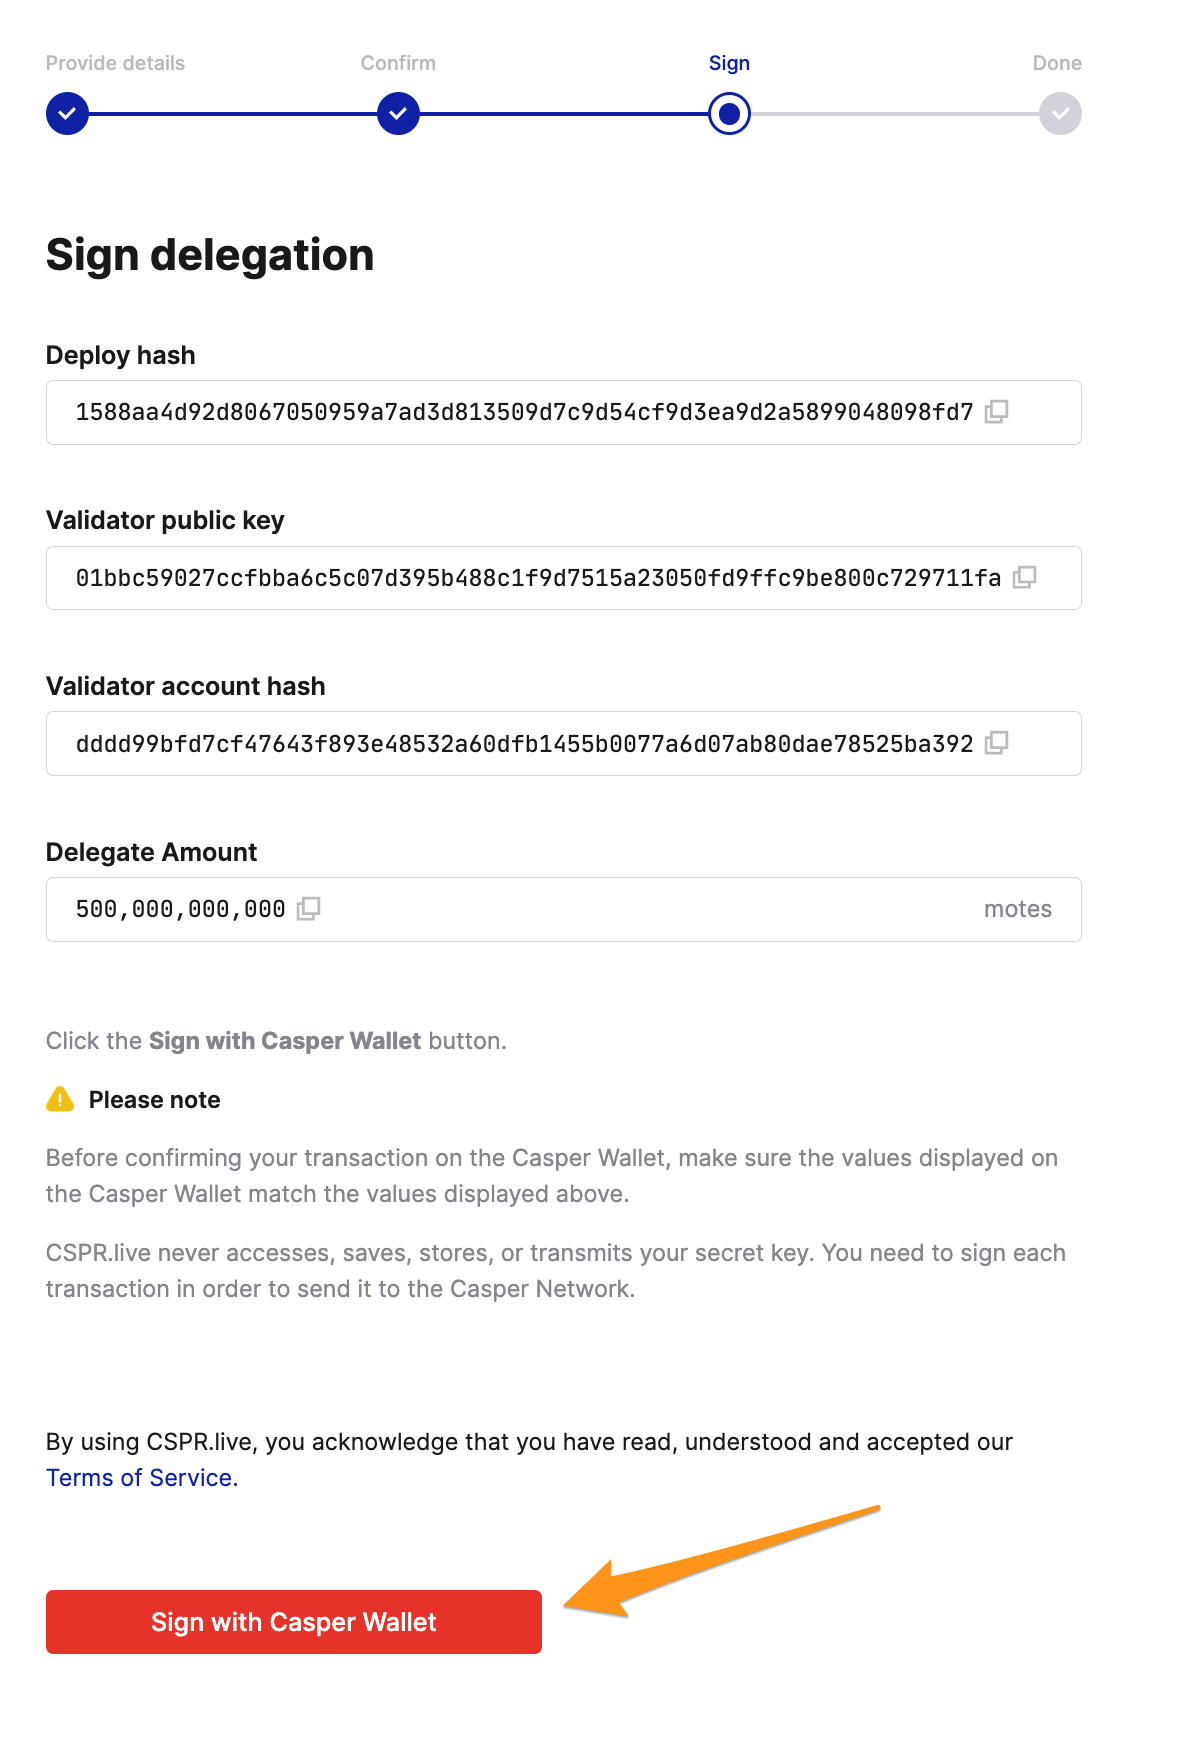
Step 3 - Sign the delegation
- Sign the delegation by clicking Sign with Casper Wallet.
- Once the Casper Wallet opens, check the deploy hash. Ensure the deploy hash in the "Signature Request" window matches the deploy hash in the "Sign delegation" window before continuing.
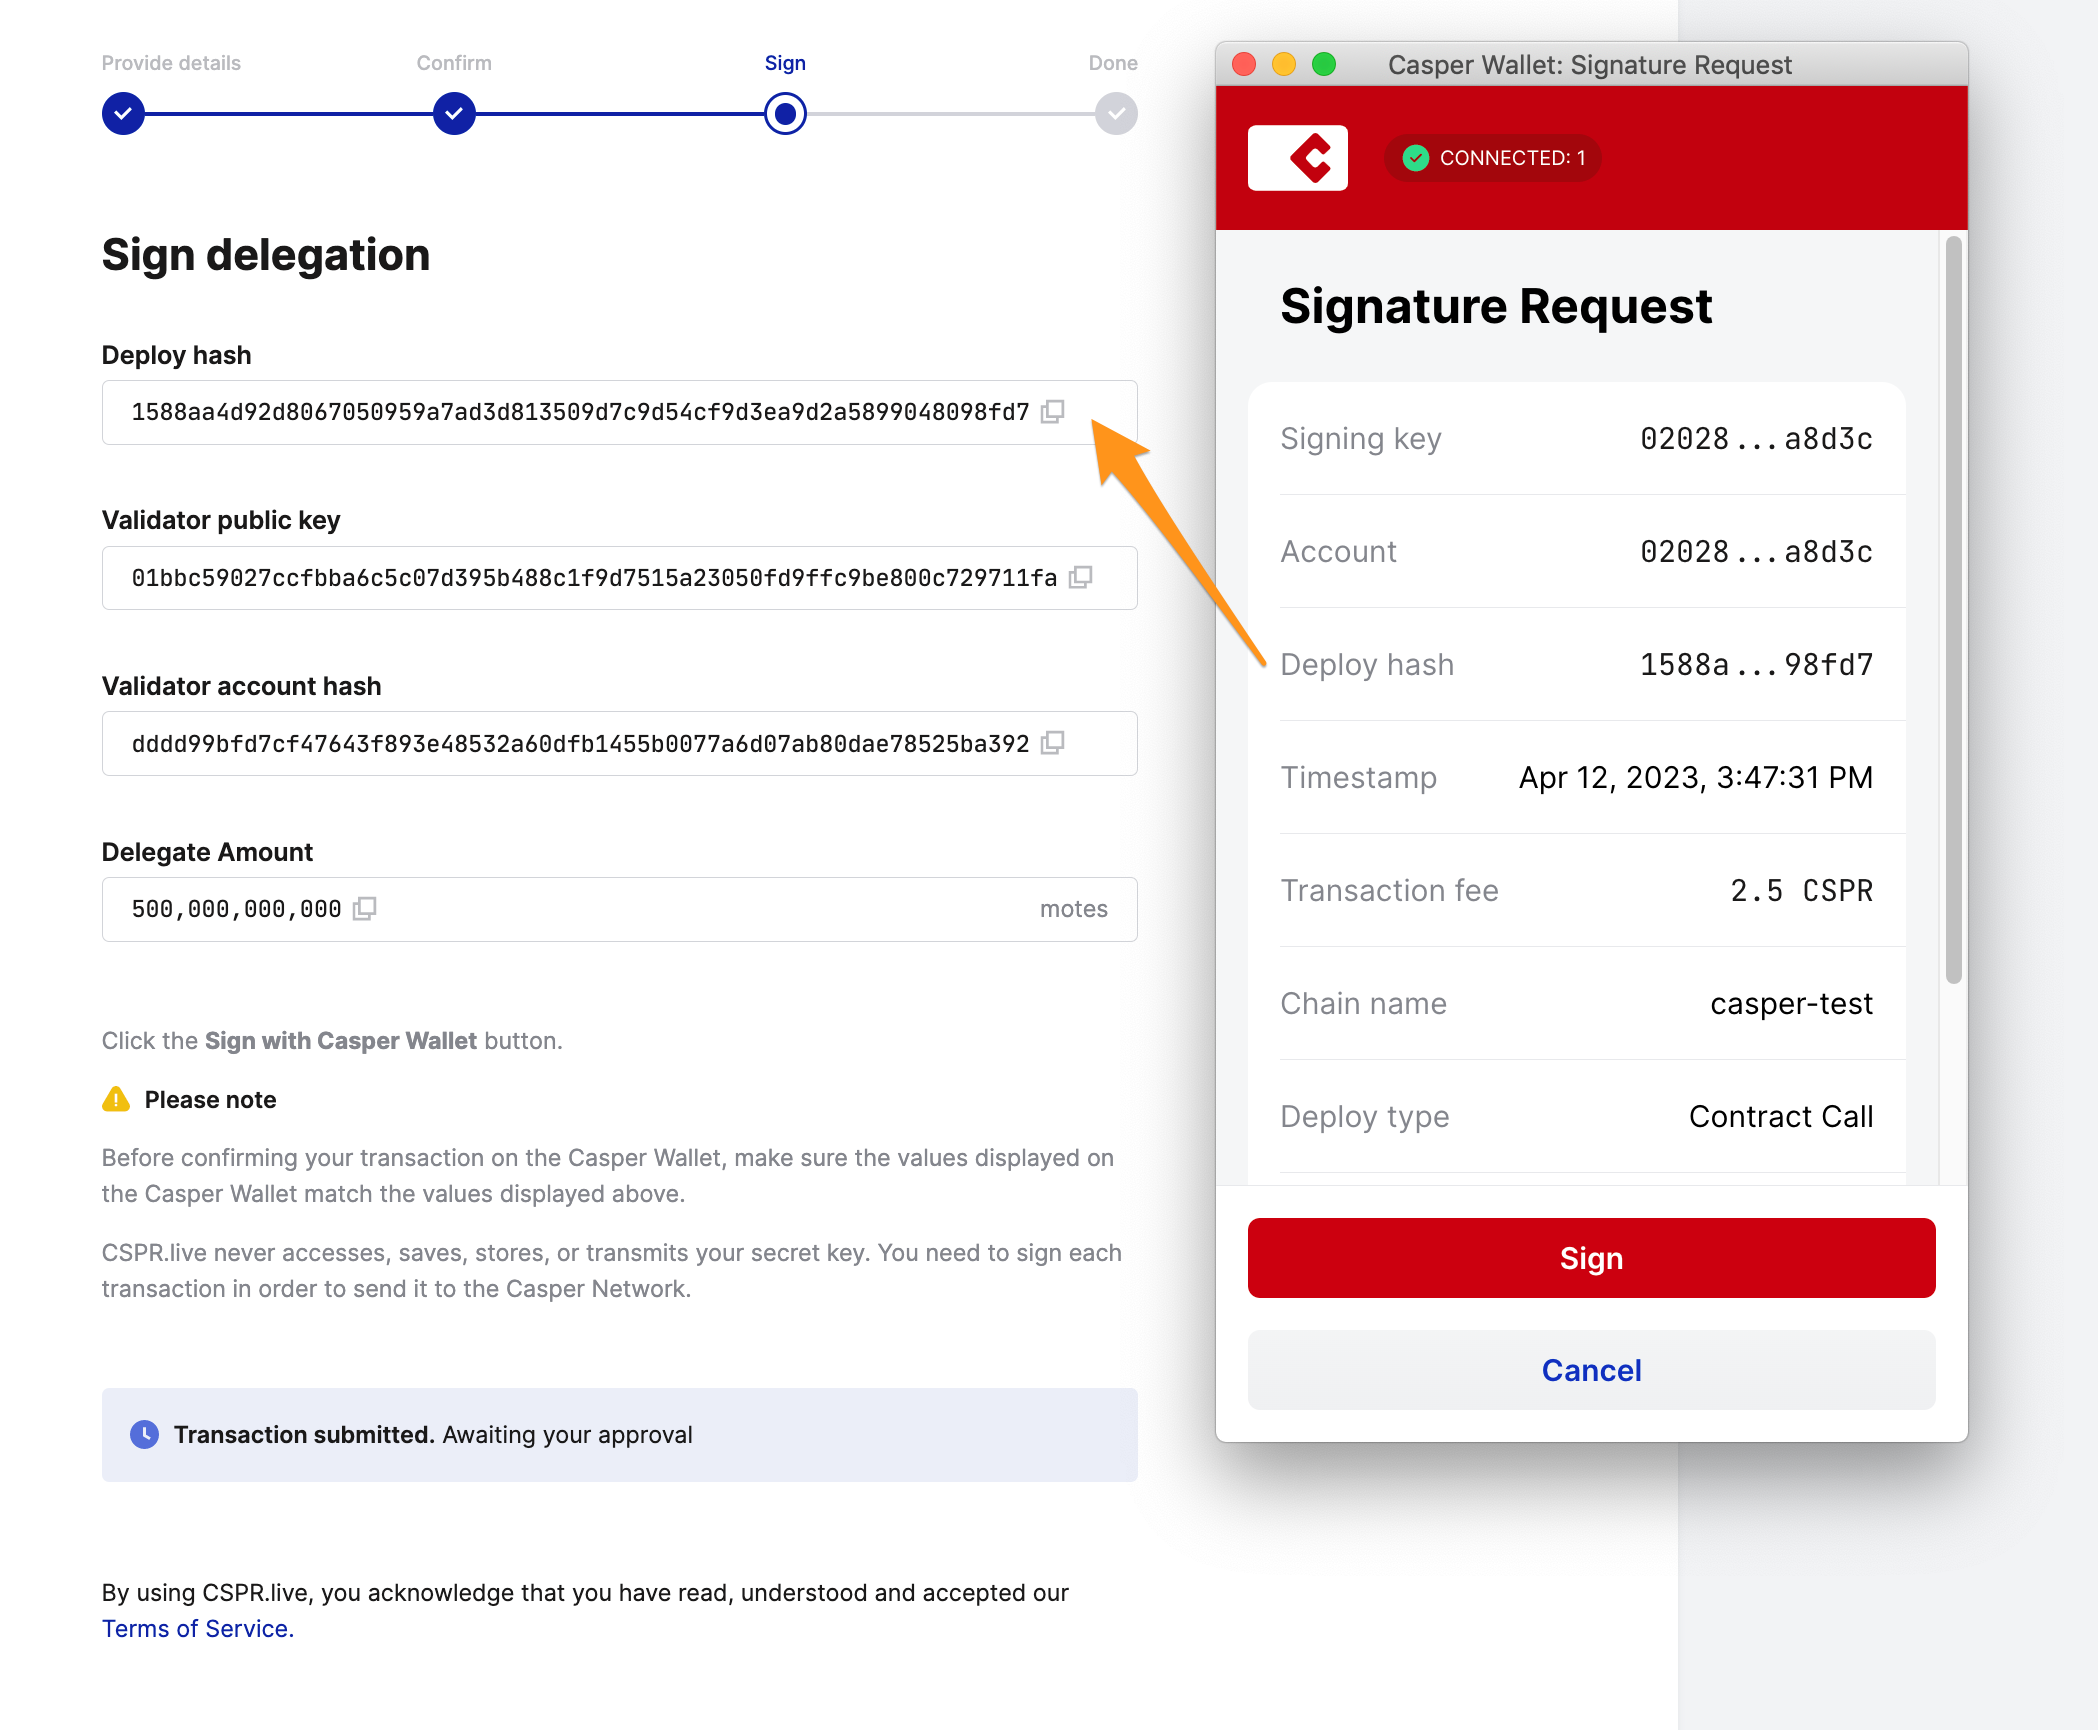
- Click Sign in the Signature Request window to finalize the delegation.
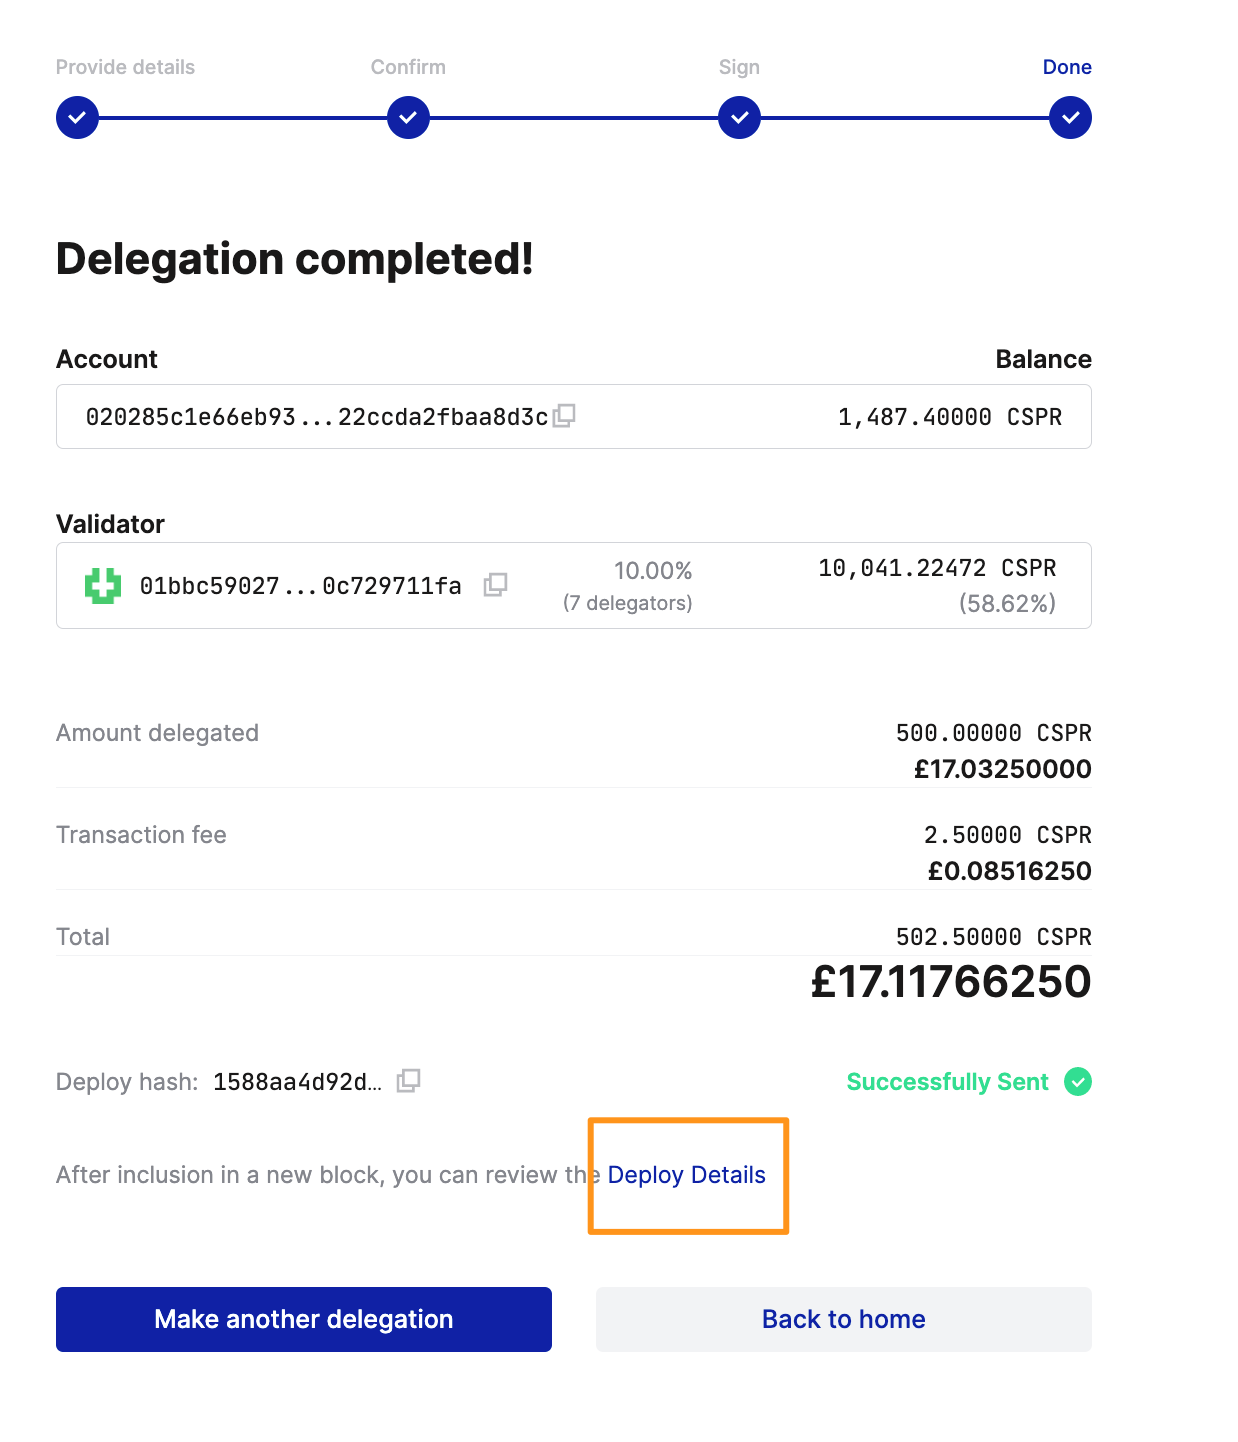
The delegation initiates as soon as the corresponding deploy is signed. You can review the details and status of the deploy by clicking the Deploy Details highlighted above.
Remember to Monitor your Stake. Staking rewards are delivered to your account's main purse after each era, which is currently set to 2 hours. Note that it may take up to 2 eras (4 hours) for the first reward to appear after delegation. The rewards are automatically added to your current stake on the corresponding validator. You may view them under the Rewards tab on your account page on https://cspr.live/.
If you want to undelegate your tokens, you can do so at any time. See the Undelegation Guide for details.
Video Tutorial
This video guide covers the process at a high level, but we recommend following the written tutorial to go through the process step by step.