Ledger Setup with Casper
A Ledger device is a hardware wallet considered one of the most secure ways to store your digital assets. Ledger uses an offline, or cold storage, method of generating private keys, making it a preferred method for many crypto users. This guide will help you connect your Ledger device to a Casper account using the cspr.live block explorer to send and receive CSPR tokens.
Before you begin
- Configure your Ledger and the Ledger Live application as described in the Getting Started with Ledger Live article.
- Install a Chromium-based browser, such as Chrome or Brave, for use with cspr.live for the Casper Mainnet.
Installing the Casper app on the Ledger device
Install the Casper app on the Ledger device by following the steps below. You can find similar instructions on the official Ledger support site.
- In Ledger Live, open My Ledger at the bottom of the left-hand menu.
Casper accounts cannot be added to Ledger Live. Do not add a Casper account using Ledger Live.
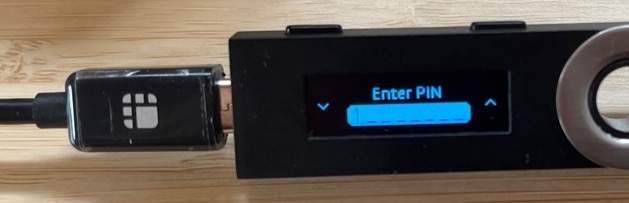
- Connect the Ledger device to your computer and unlock it by entering your device PIN.
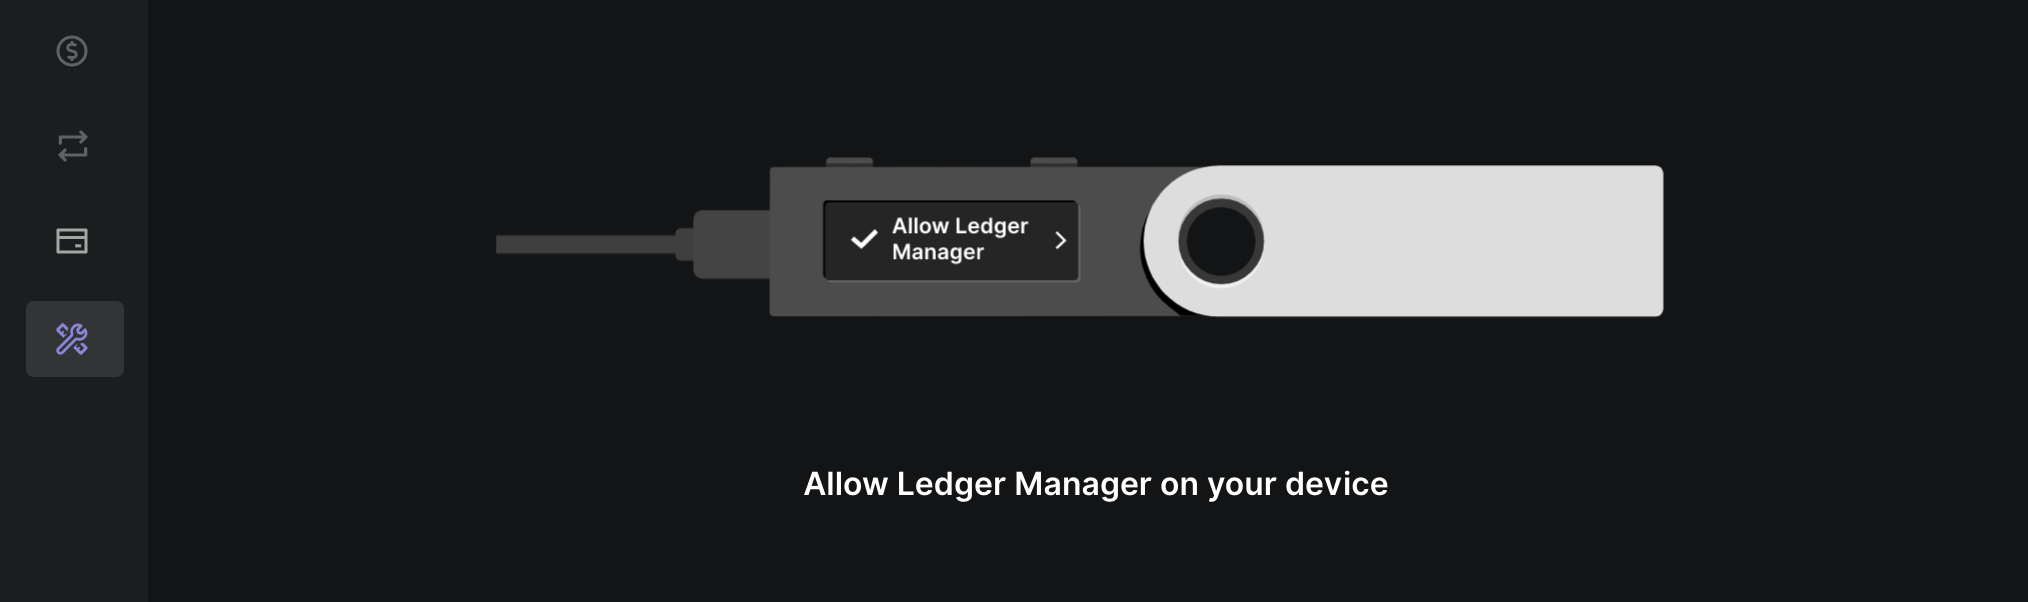
- If asked, allow Ledger manager on your device.
- Find Casper in the app catalog.
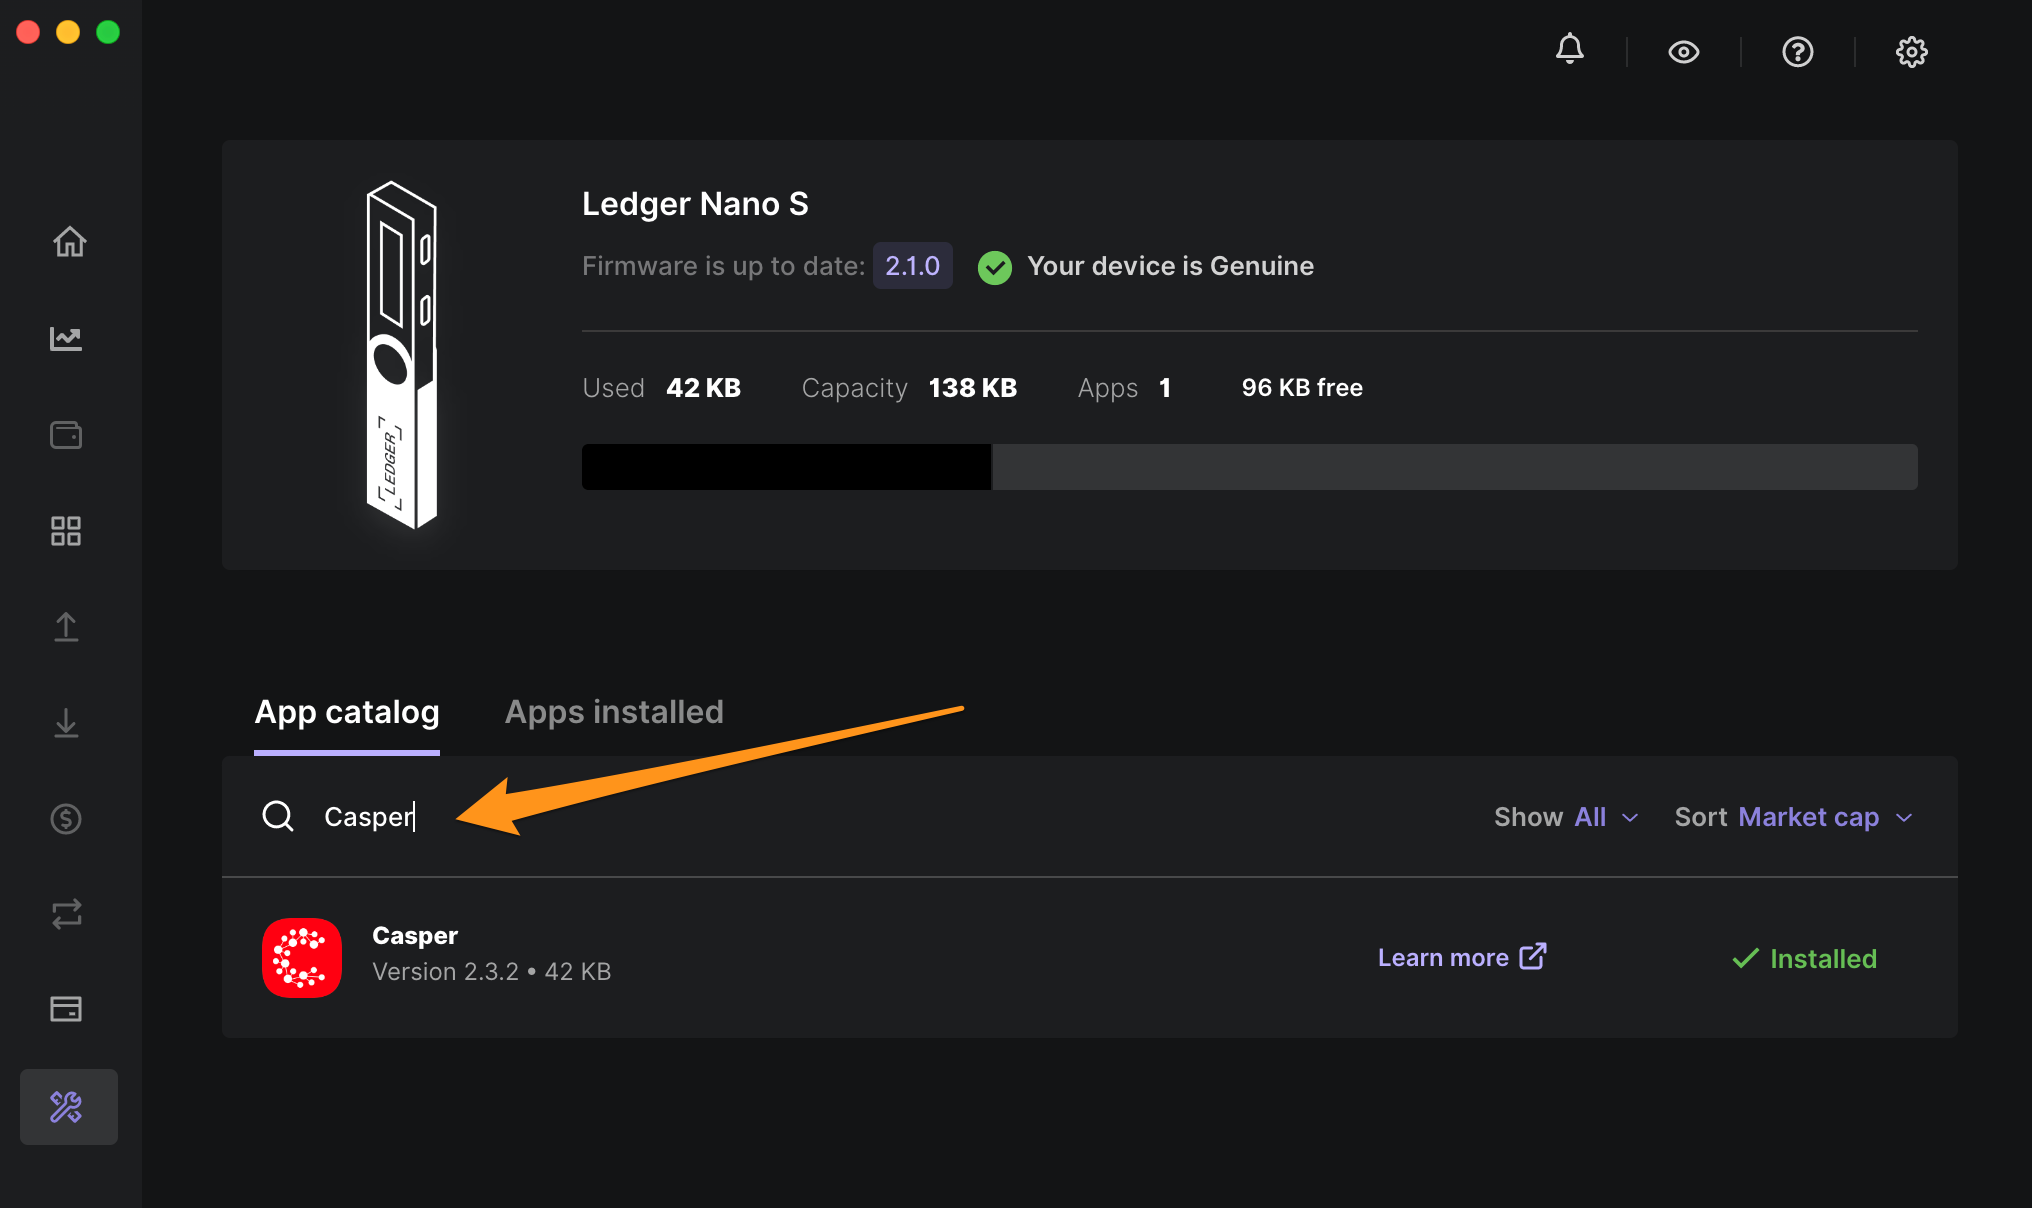
Having trouble finding the Casper app? Please search "Casper," not "CSPR" when searching for the app in the "My Ledger" tab in Ledger Live.
- Click the Install button of the app.
- An installation window appears.
- Your device will display "Processing..."
- The app installation is confirmed.
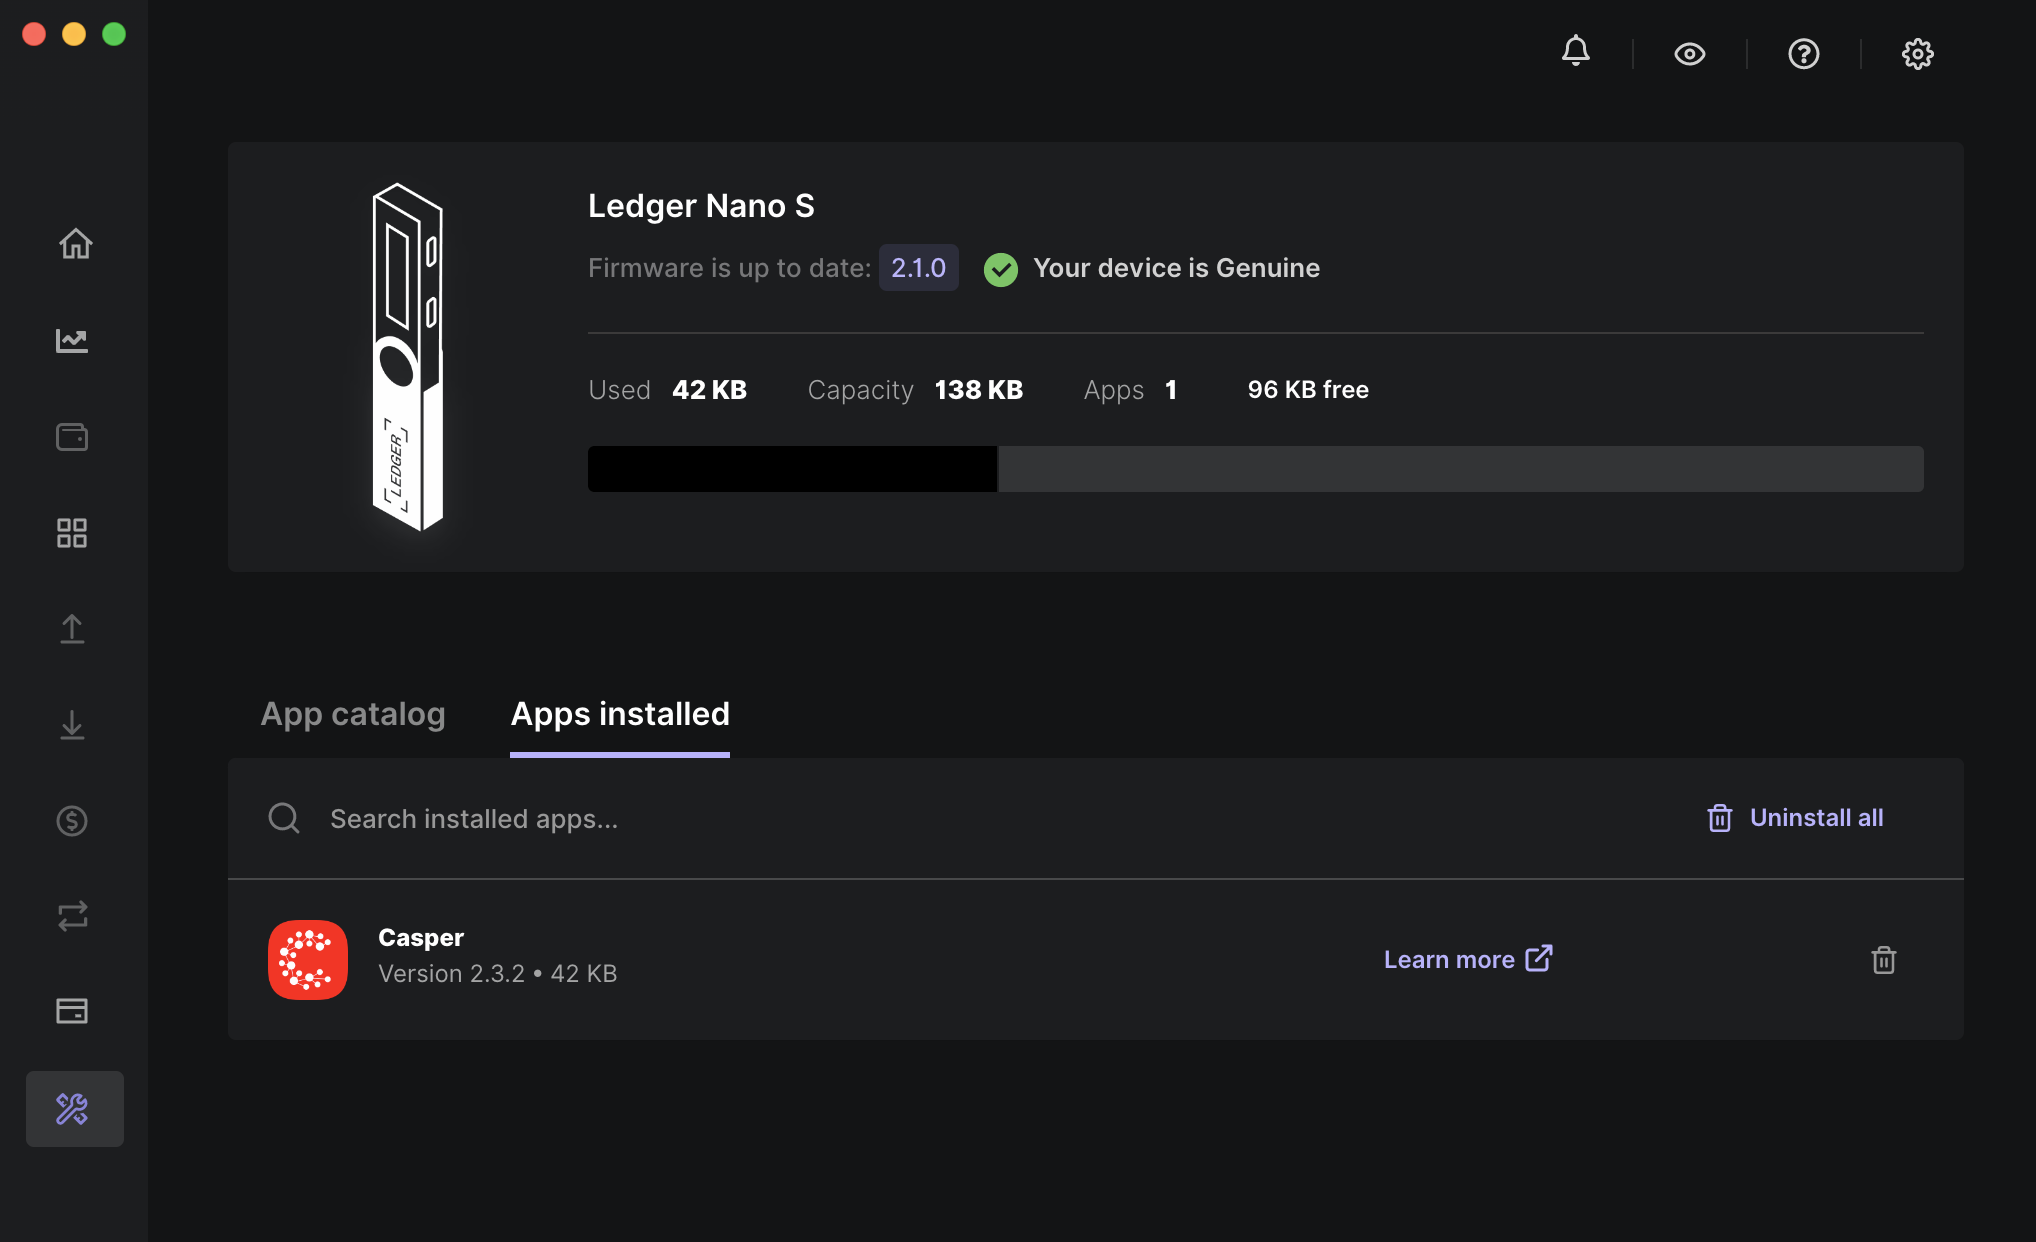
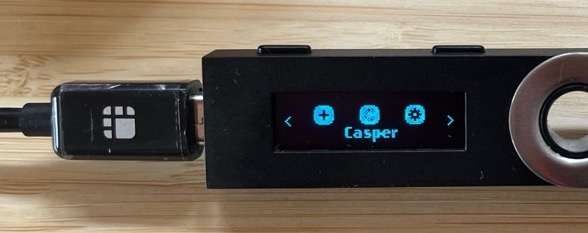
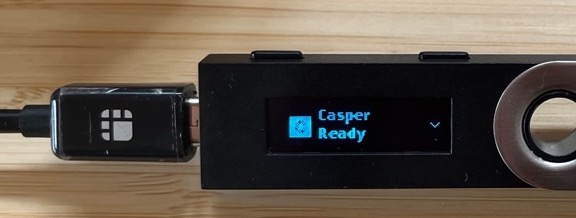
- Open the Casper App on your Ledger device by clicking both buttons on the device, and keep it open while doing the next steps.
Using Ledger with a Block Explorer
Sign in
To use the Ledger device with the cspr.live block explorer, follow these steps:
- Connect the Ledger device to your computer and unlock it by entering your device PIN.
- Open the Casper app on the Ledger device as shown above.
- While keeping the Casper app open, navigate to cspr.live/sign-in.

- Click on the Connect button in the Ledger section.
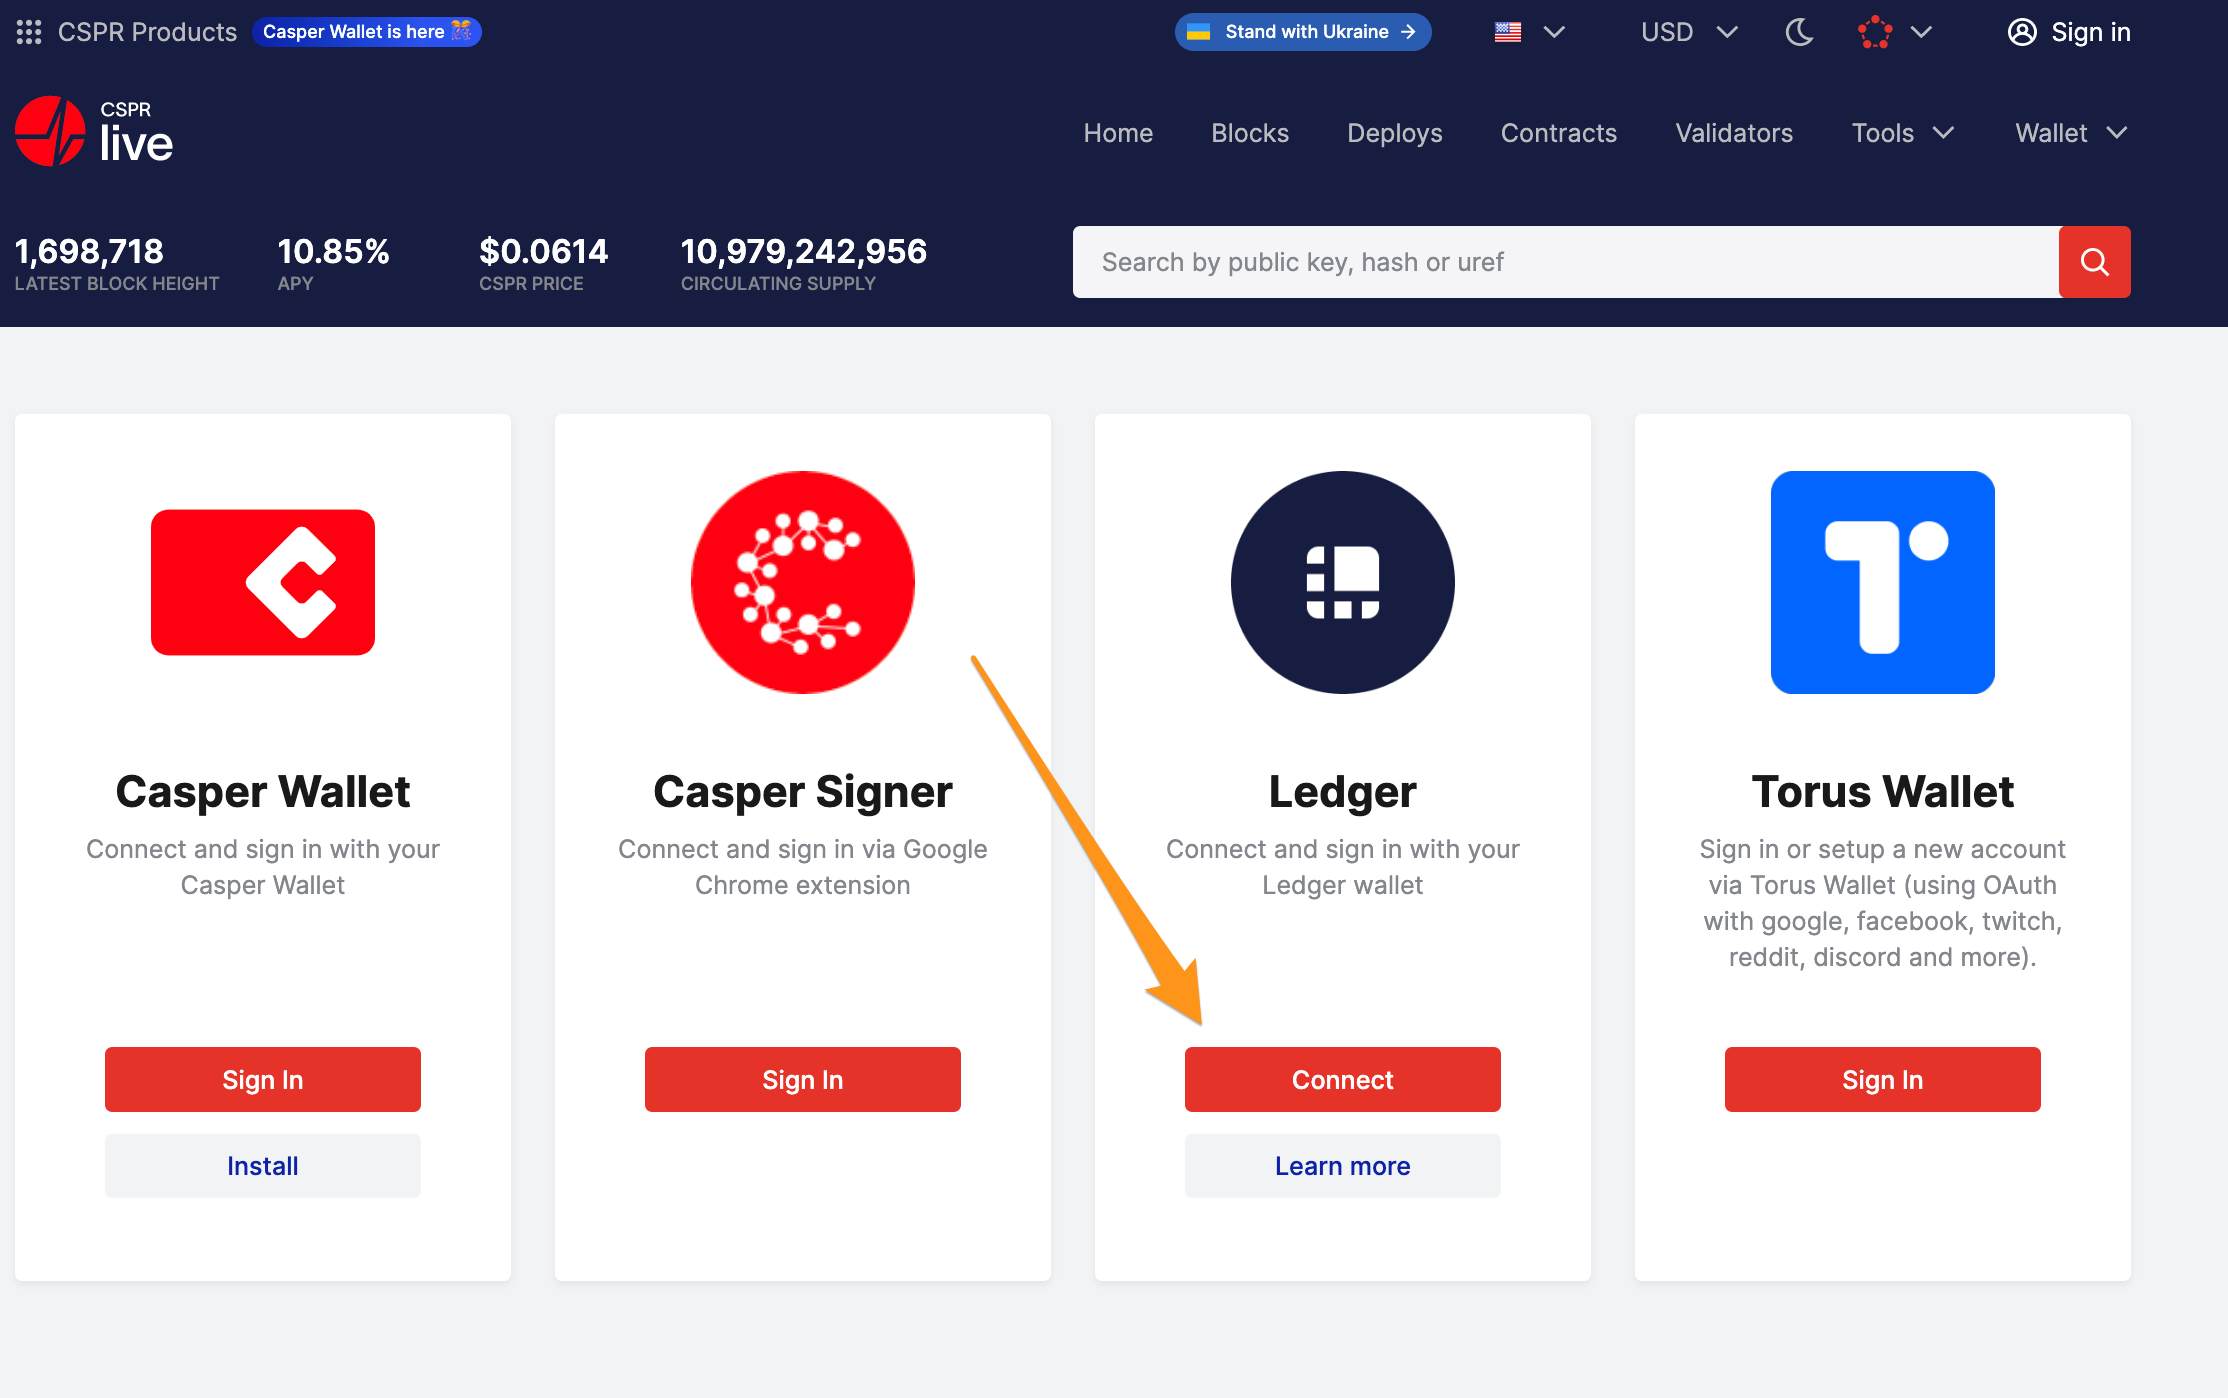
- Click the Connect to Ledger wallet button next.

- Select an account you want to use.
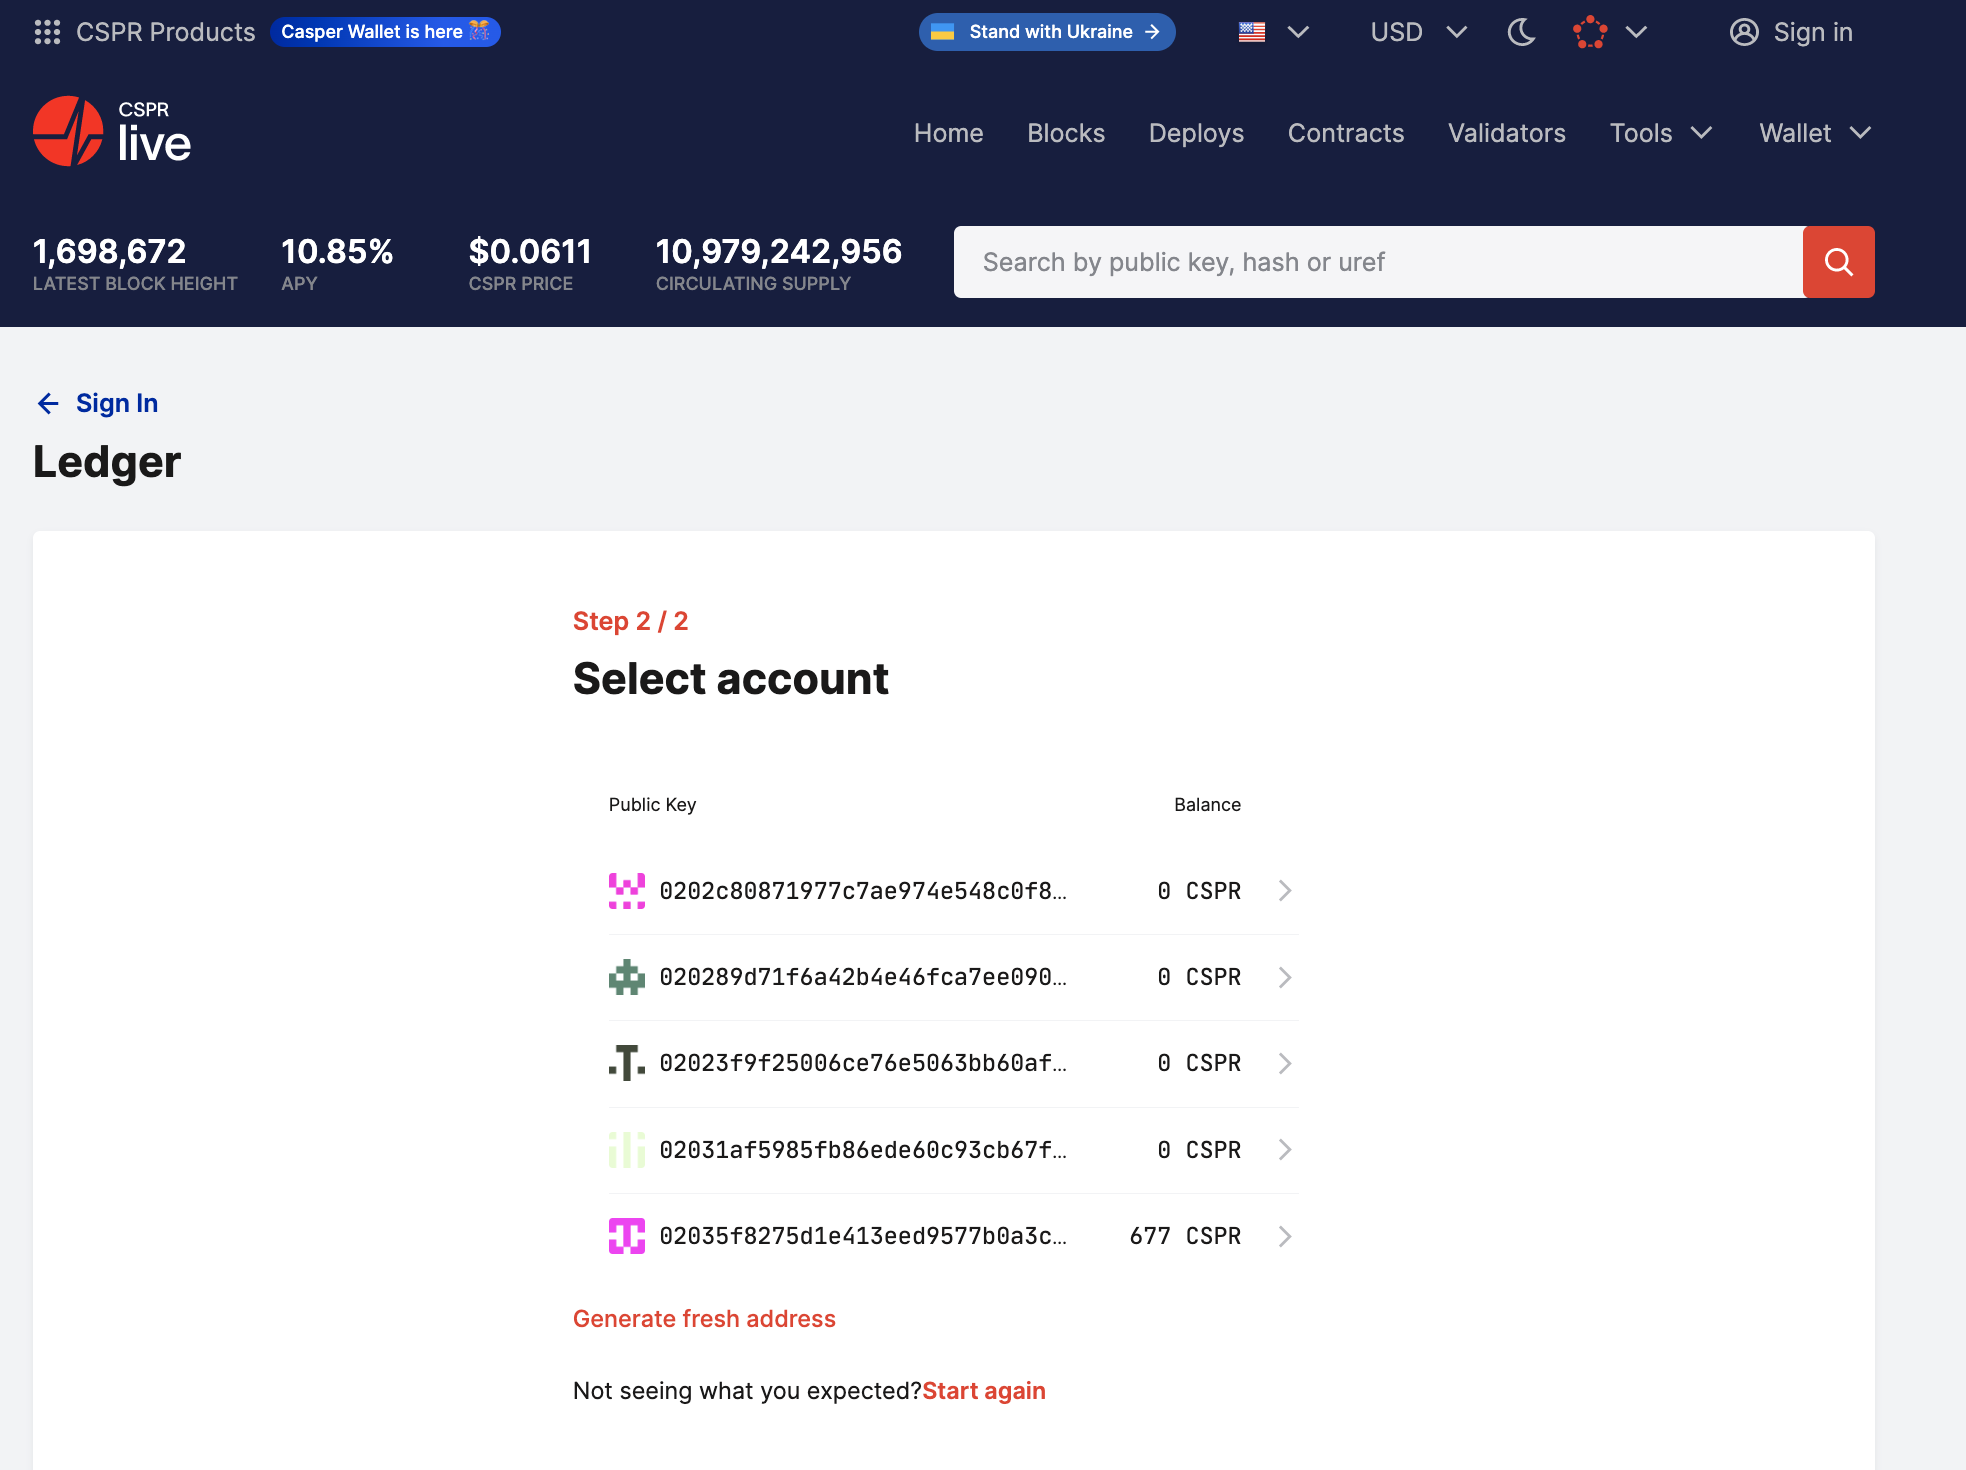
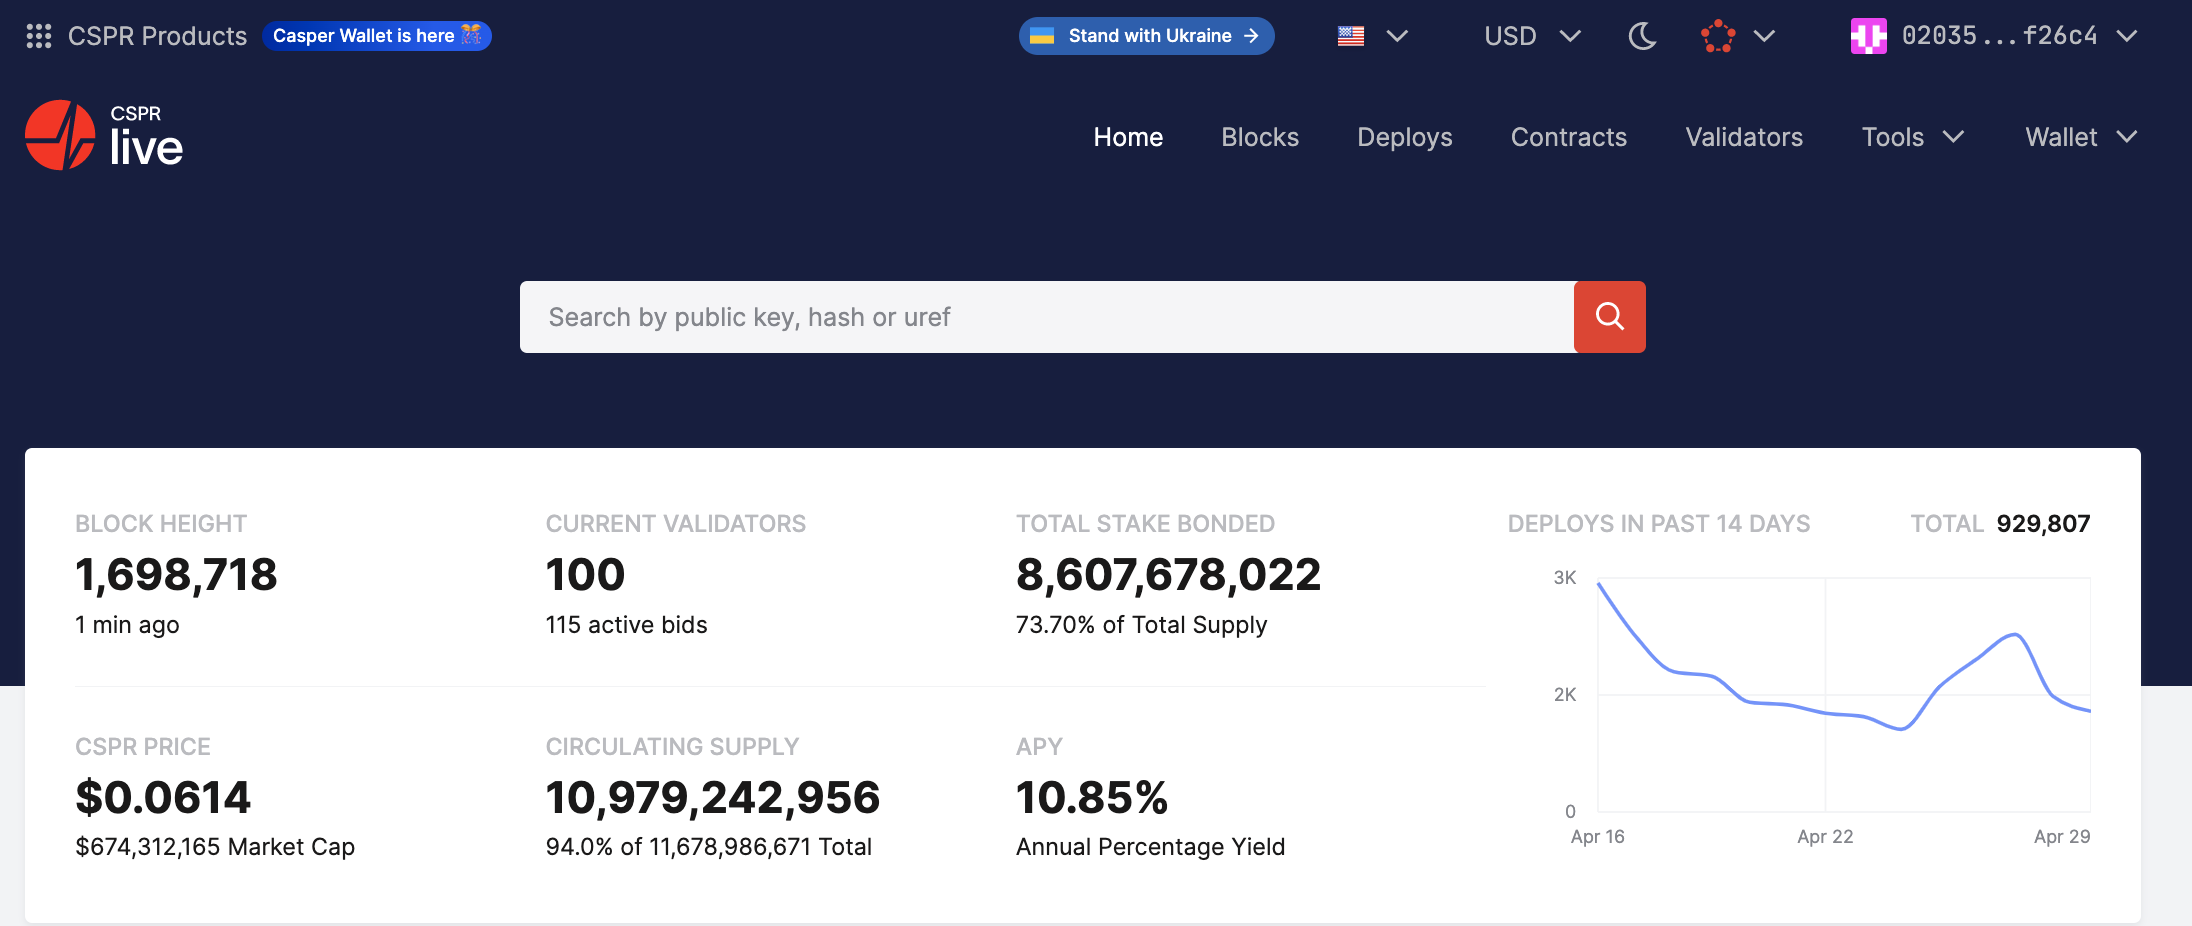
- Your Ledger device is now connected to the block explorer, displaying your account details.
Viewing account details
- Open cspr.live.
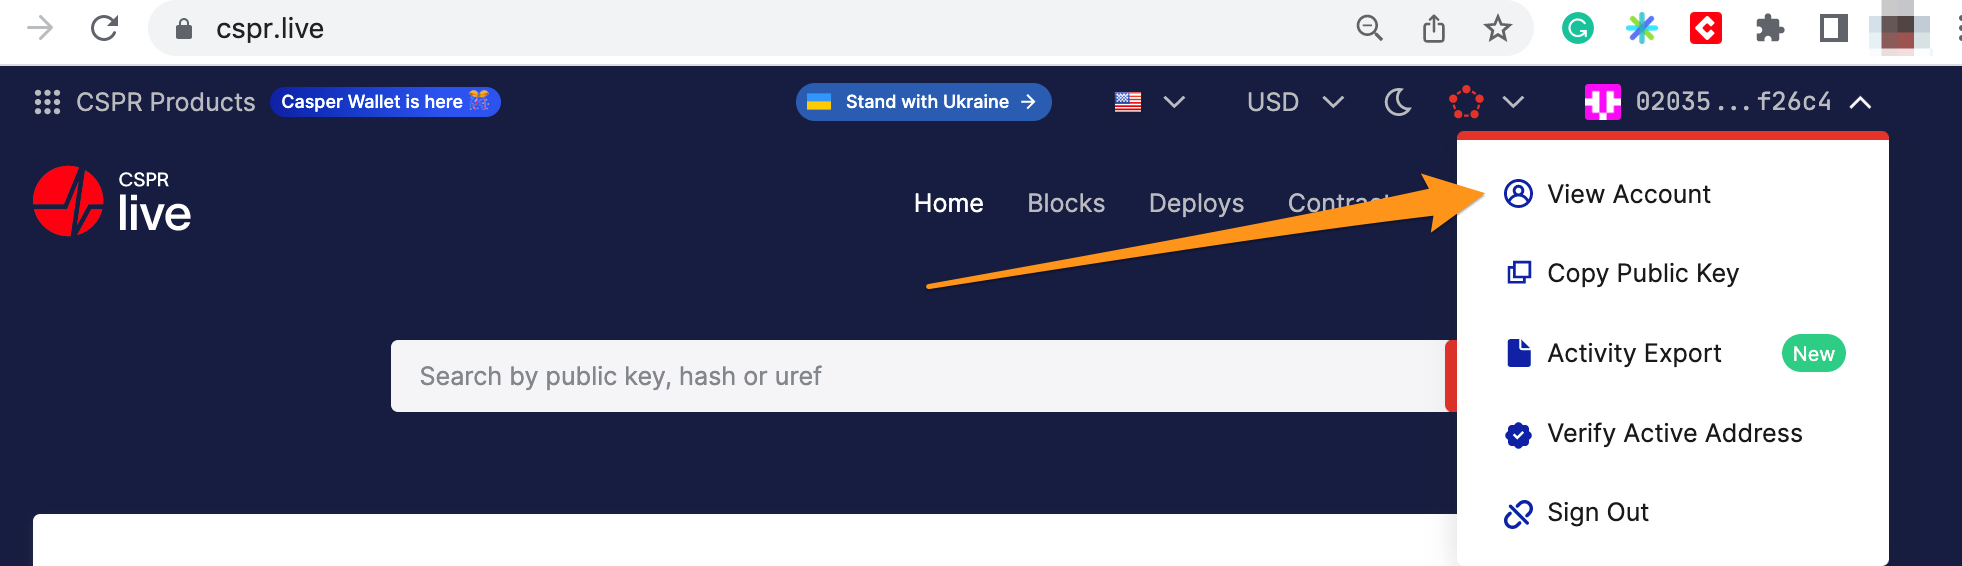
- Click on the account in the upper-right corner of the page.

- Click on the View Account button.
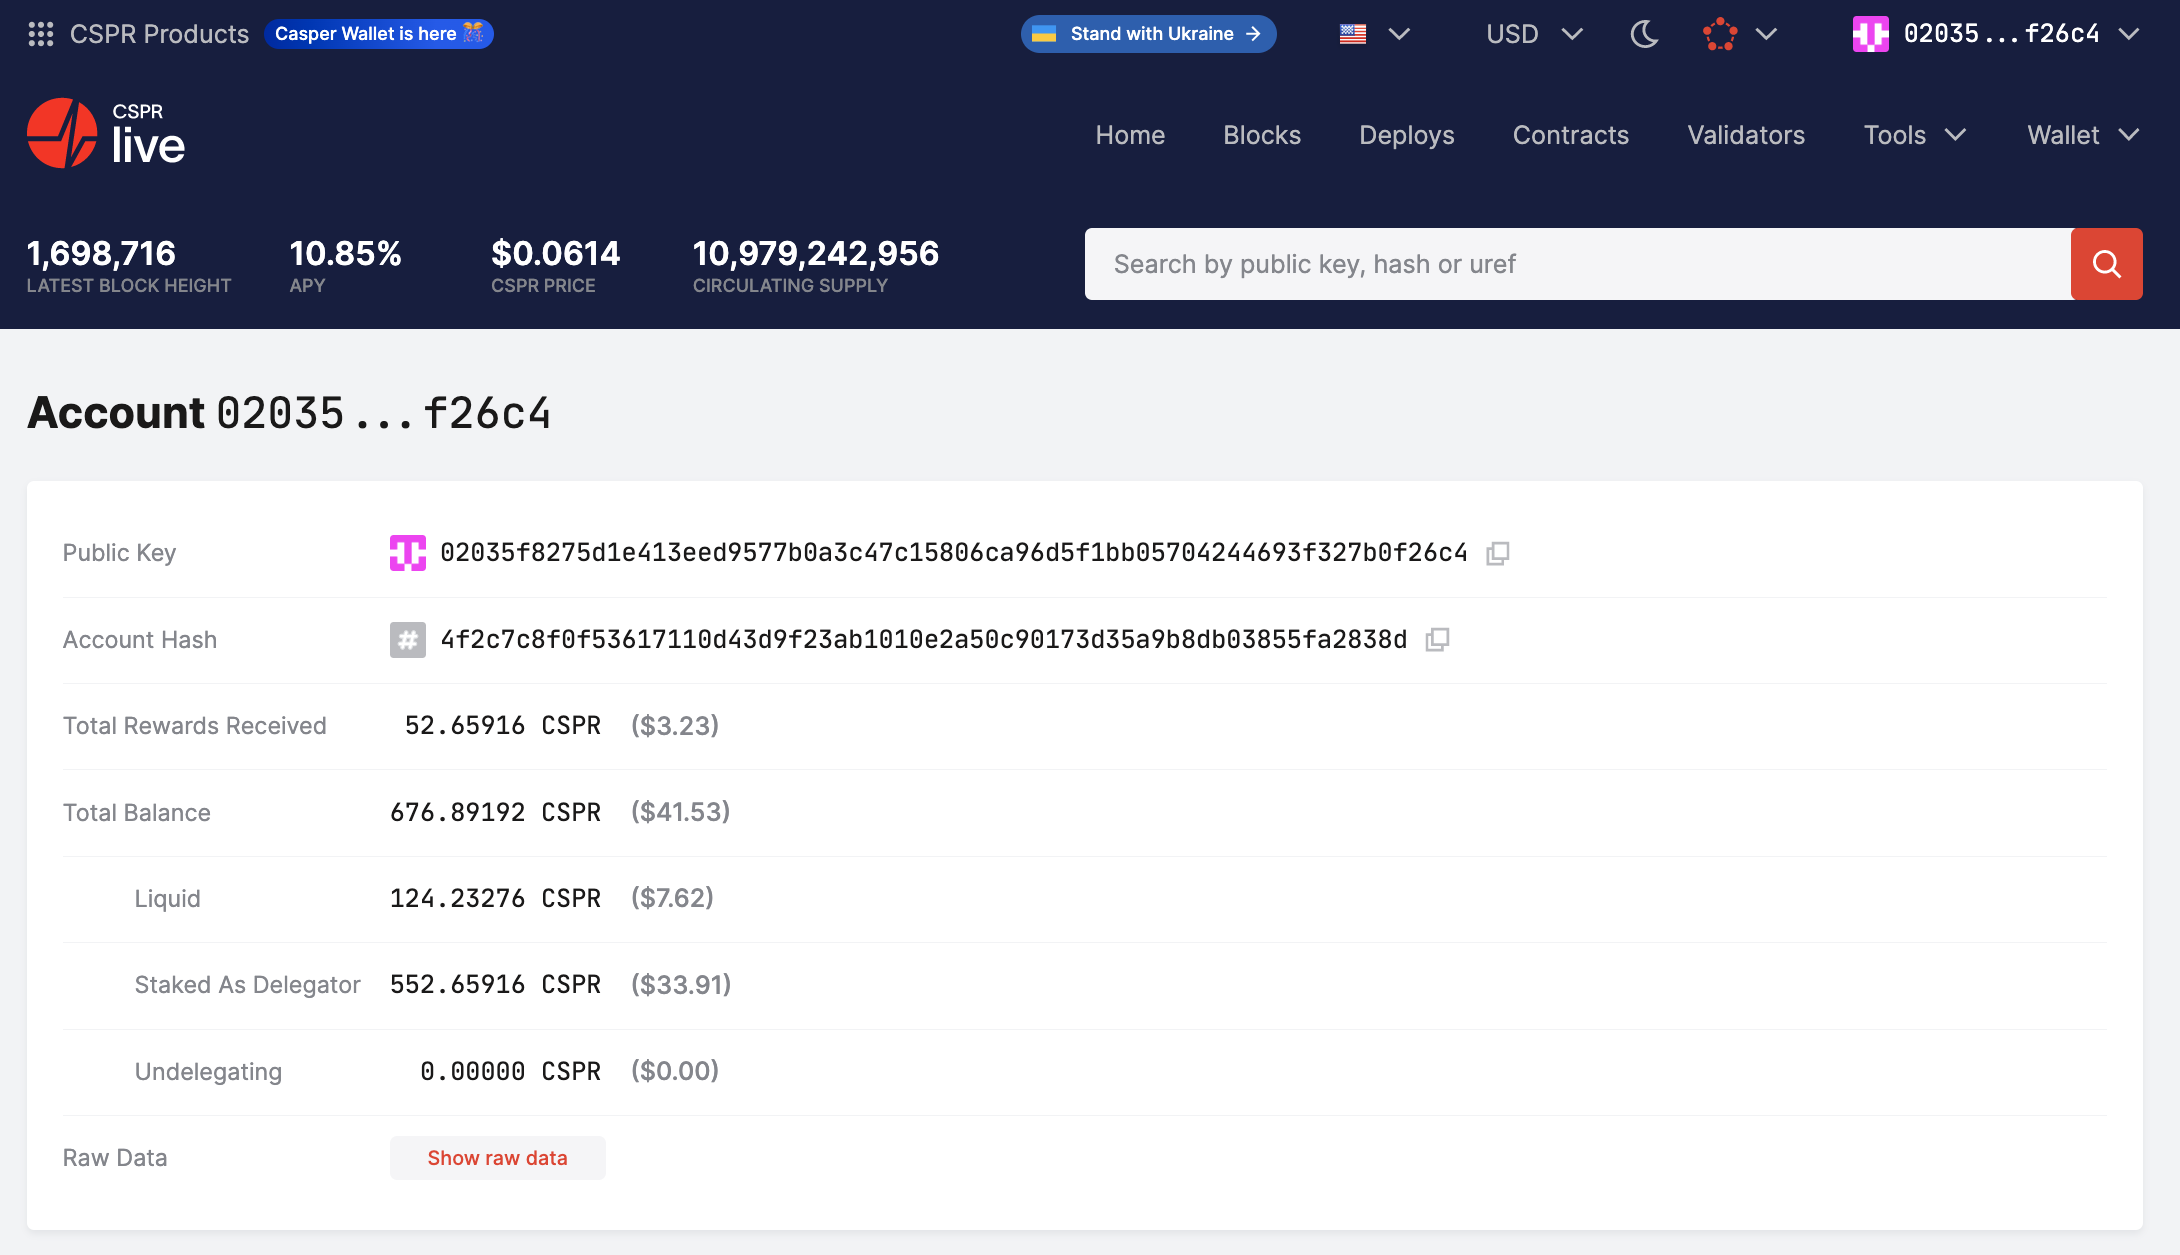
- You are presented with a page displaying details about your account. Check your account's main purse balance in the Liquid row under Total Balance.
Receiving tokens
To receive tokens, you need to provide the sender with your account's public key. To find it, follow these steps:
- Open the account details page as described here and copy the public key in the Public Key row.
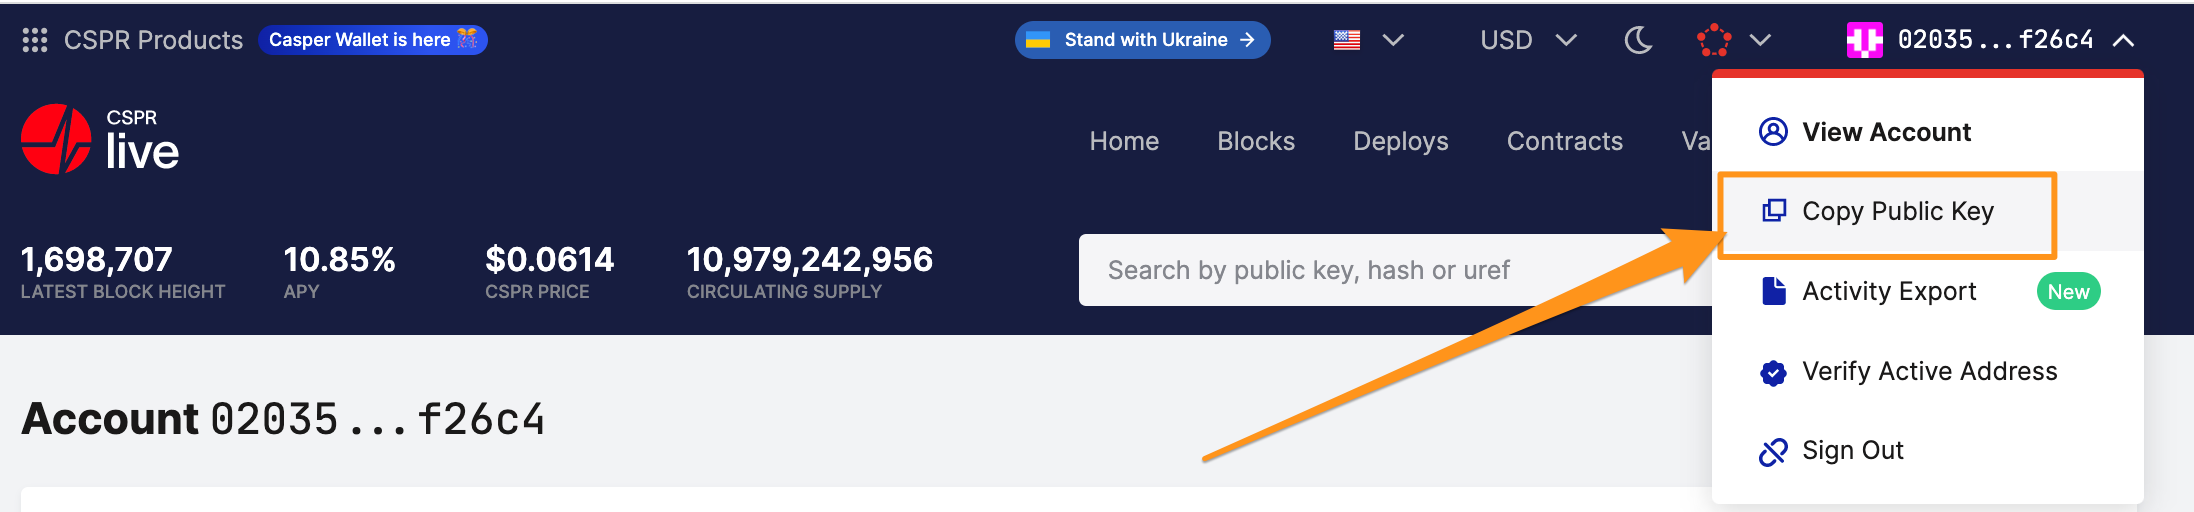
- Alternatively, click on the drop-down menu on your account address.
- Click on the Copy Public Key button and share it with the sender.
Sending tokens
- Open cspr.live.
- Sign in with your Ledger device.
- Click on Wallet and then Transfer CSPR.

- Fill in the details for the transfer.
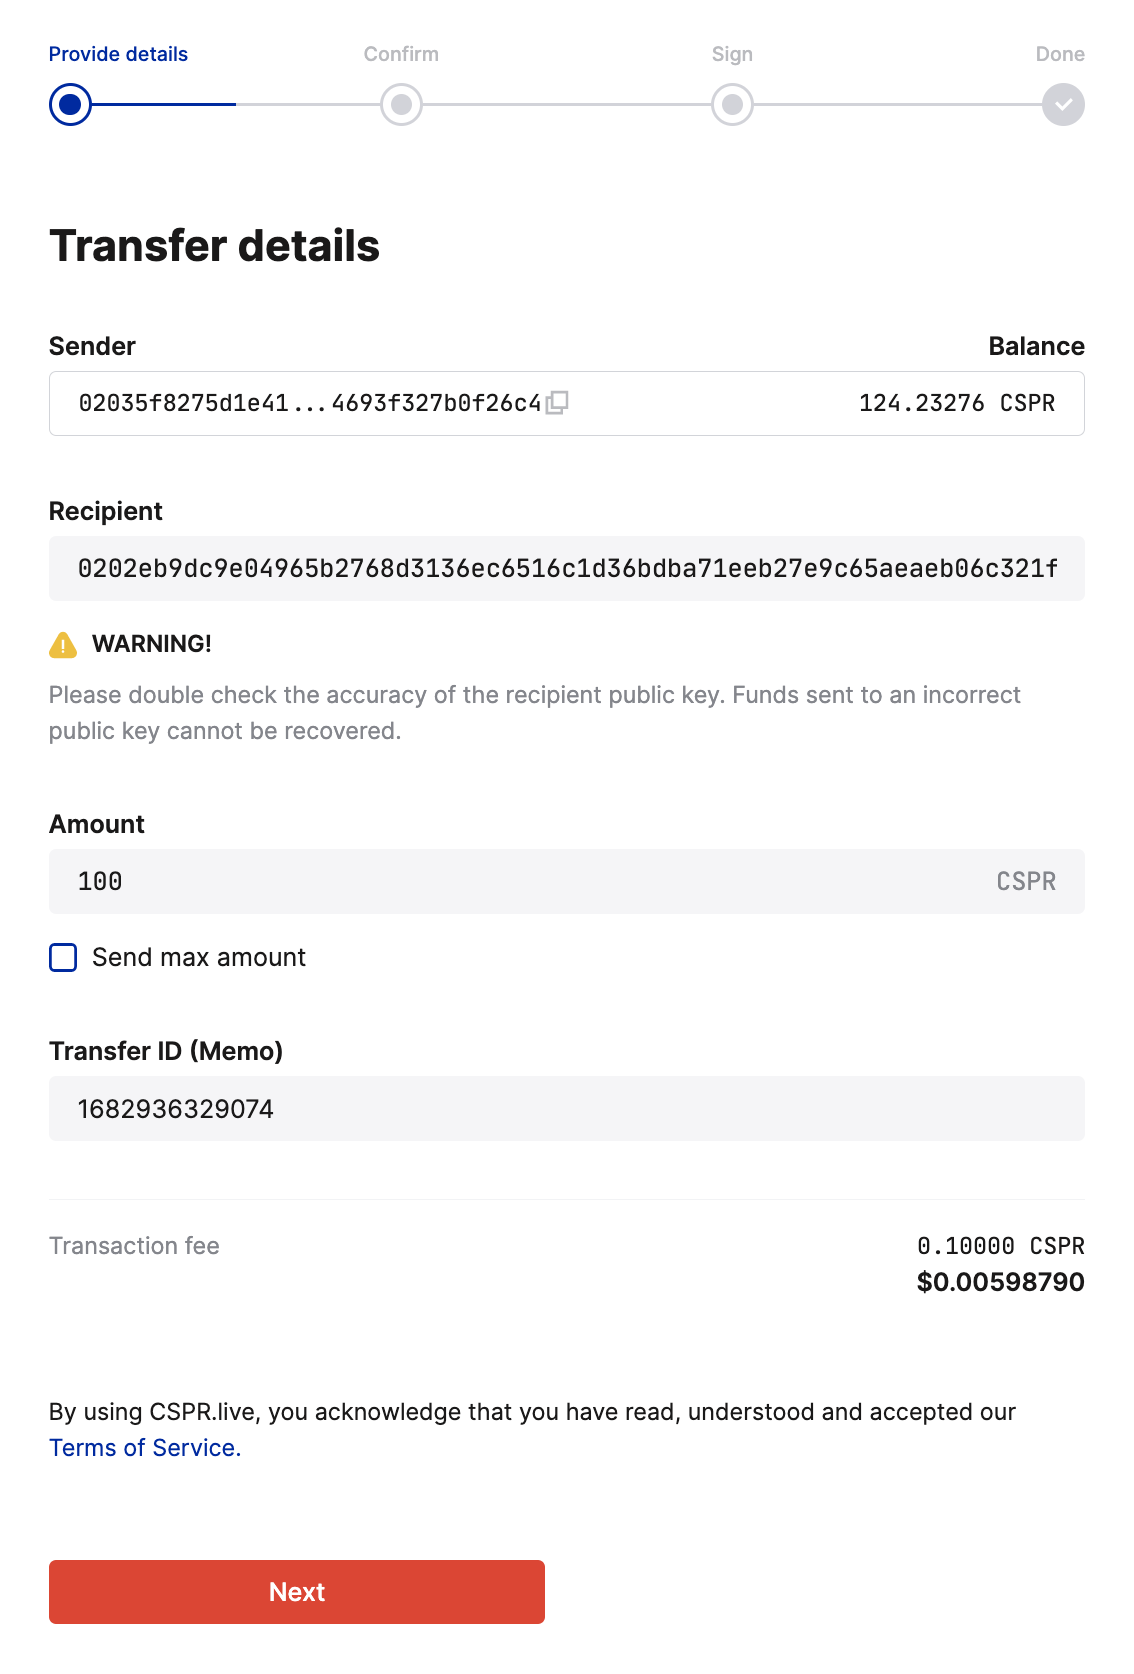
- Click on the Next button.
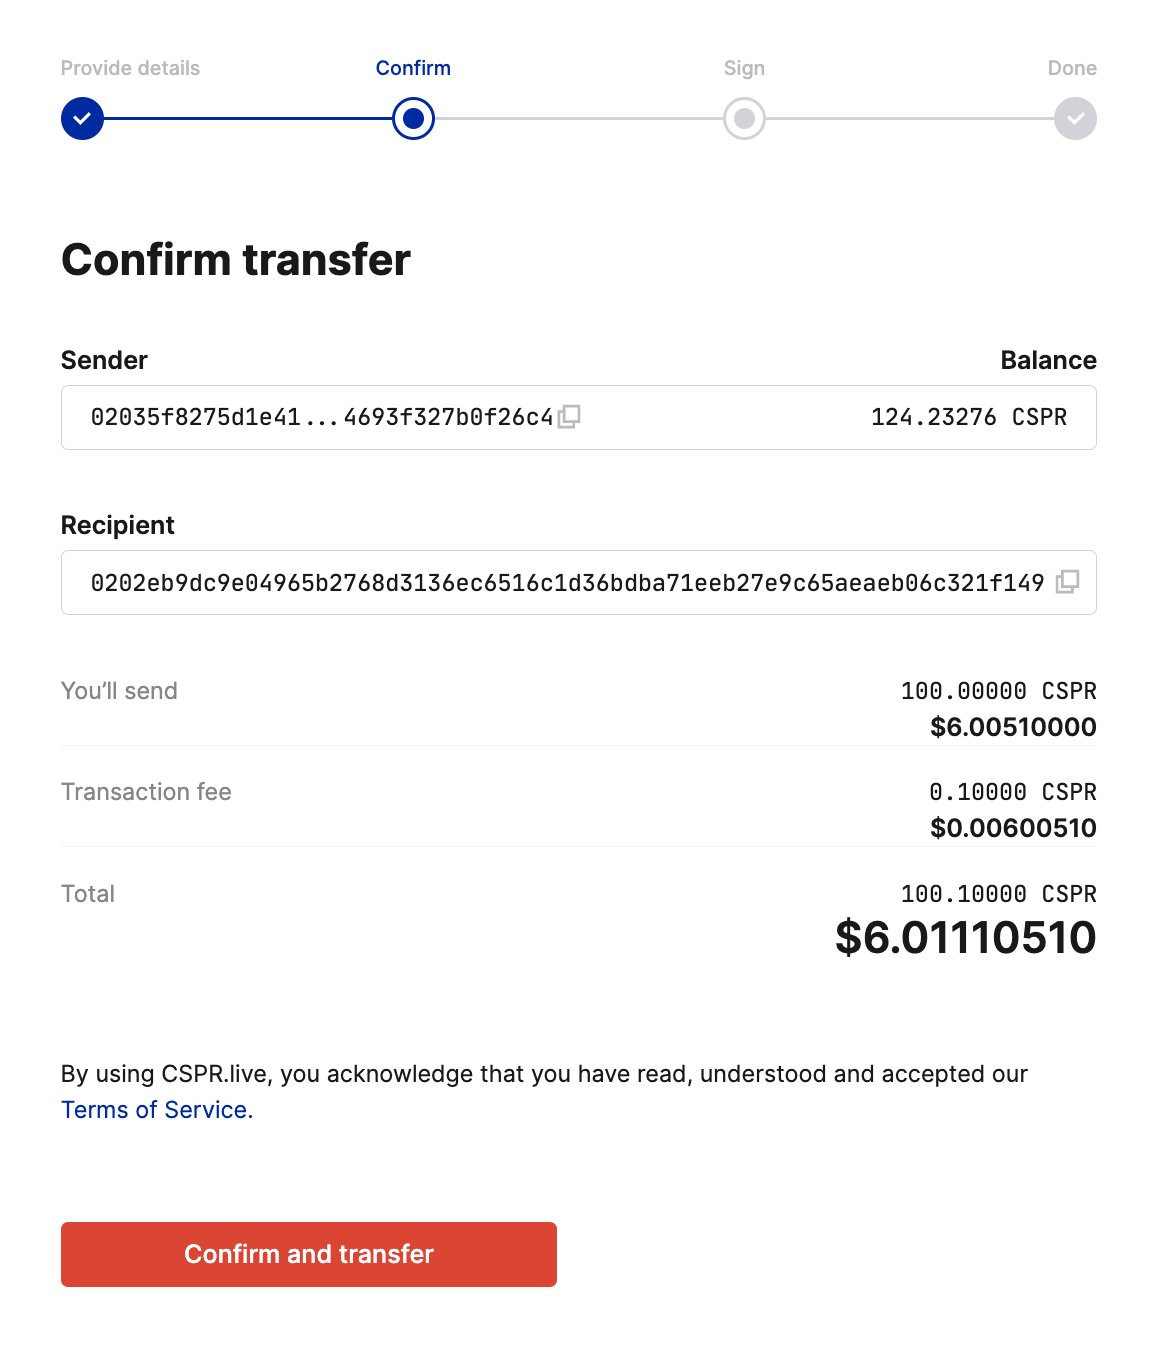
- On the next page, click Confirm and transfer.
- On the Sign transaction page, click on the Sign with Ledger button.
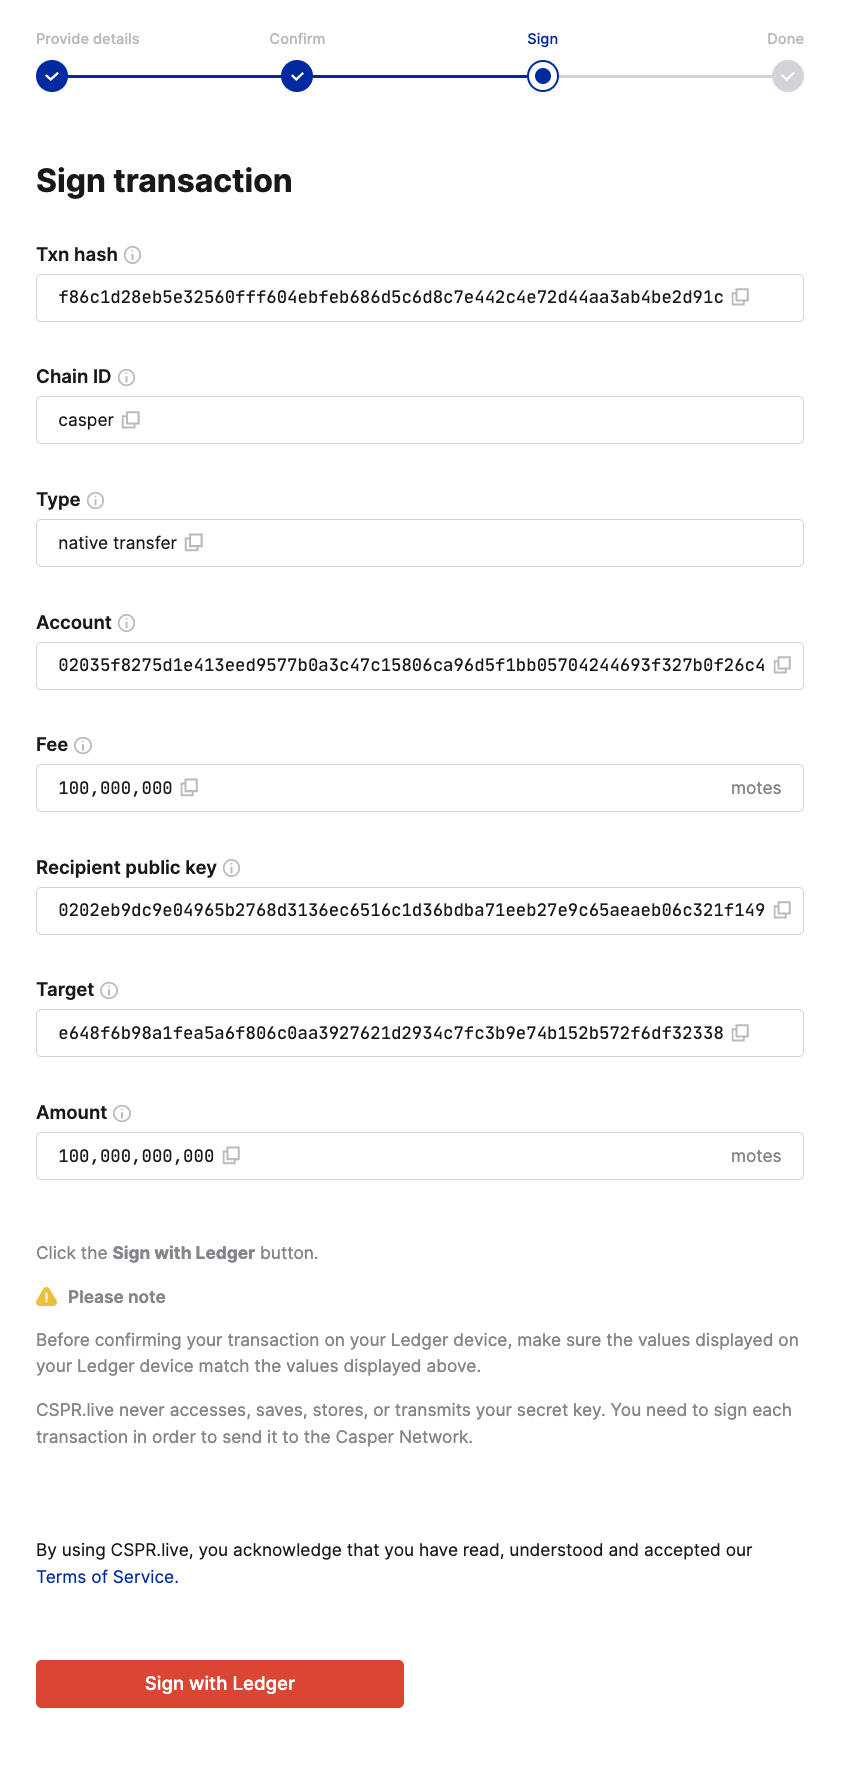
- Your Ledger hardware wallet will present you with transfer details. Verify the transfer details (txn hash, chain ID, source account, fee, target, and amount). Meanwhile, the block explorer will show this message:
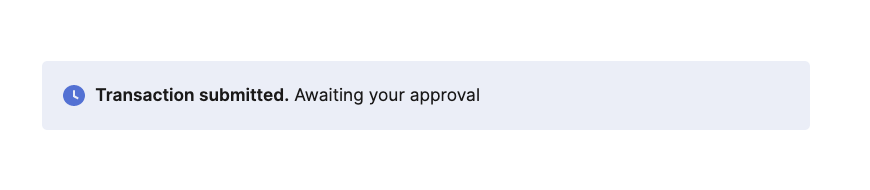
Verify the transaction on your Ledger device
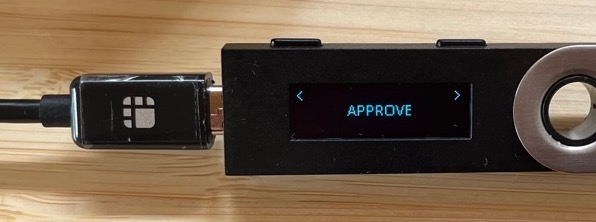
Press the right button on your Ledger Device to review the transaction details (Amount and Address) until you see "Approve".
- Verify the txn hash - ensure it matches the value displayed on cspr.live.
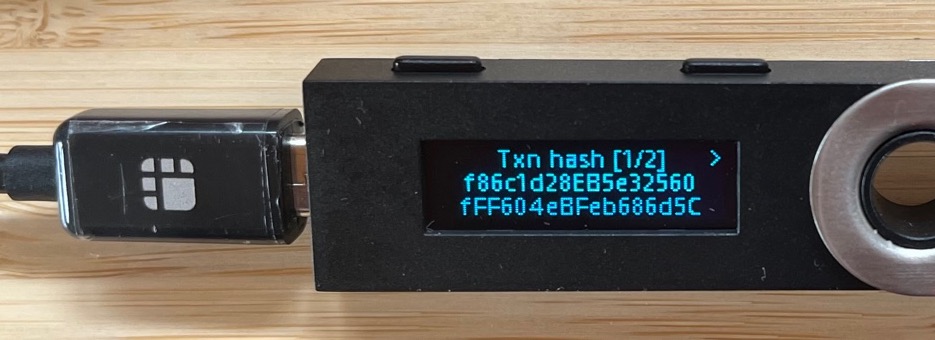
The txn hash value continues on a second screen.
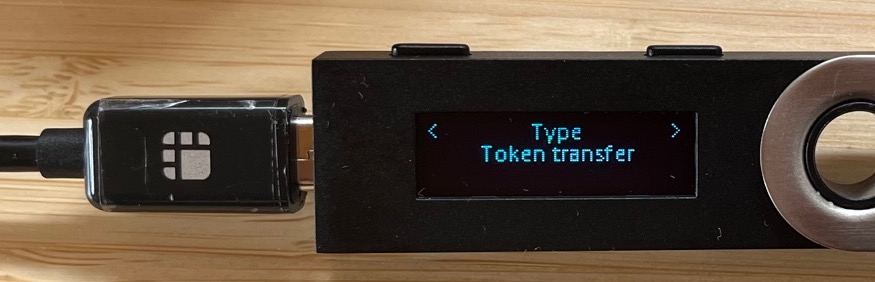
- The next page displays transaction type - for CSPR transfers, that will be Token transfer.
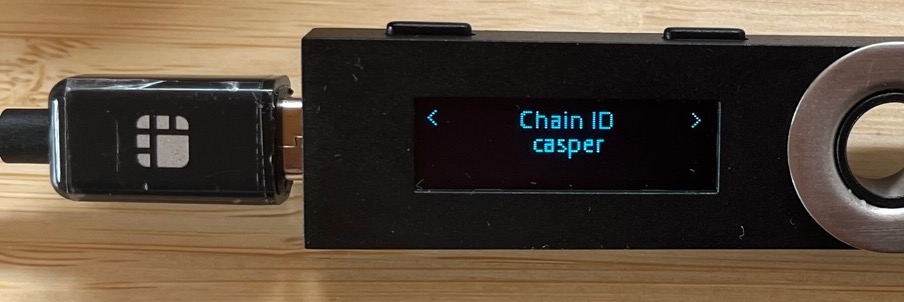
- Verify the chain ID, which identifies the network to which you want to send the transaction.
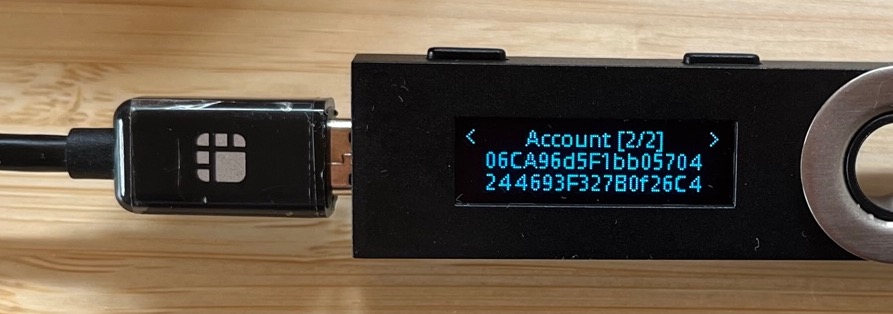
- Verify the account, which is the account's public key that initiated the transaction.
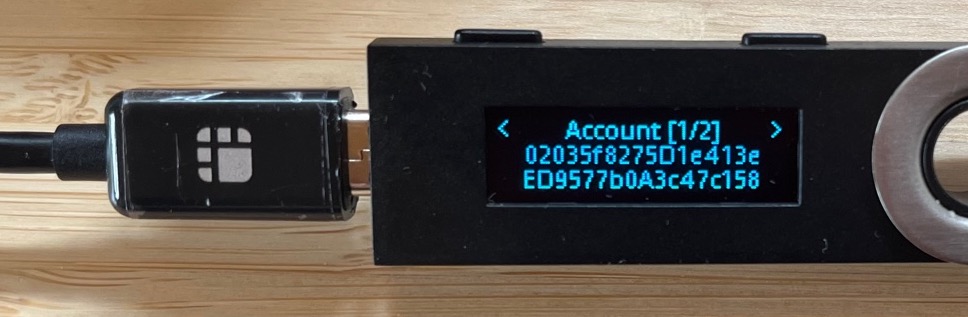
The account value continues on a second screen.
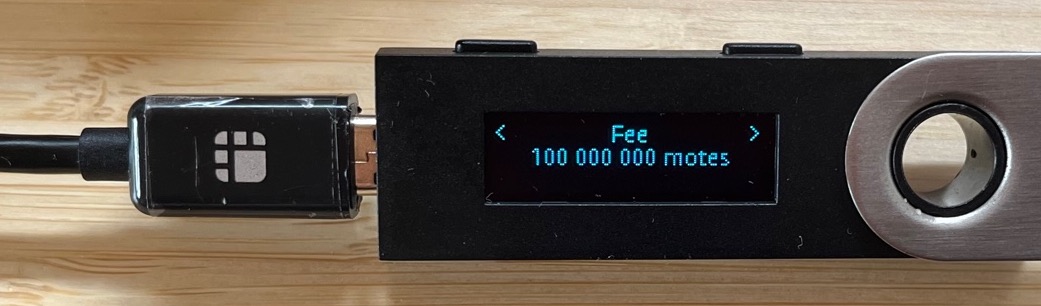
- Verify the fee. For CSPR token transfers, that value should be constant and equal to 10 000 motes = 0.00001 CSPR.
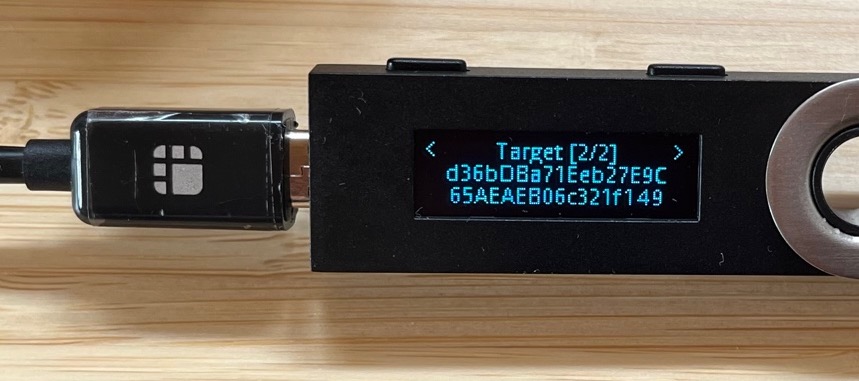
- Verify the target, which is the hash of the recipient's public key. Compare this value with the one in the block explorer.
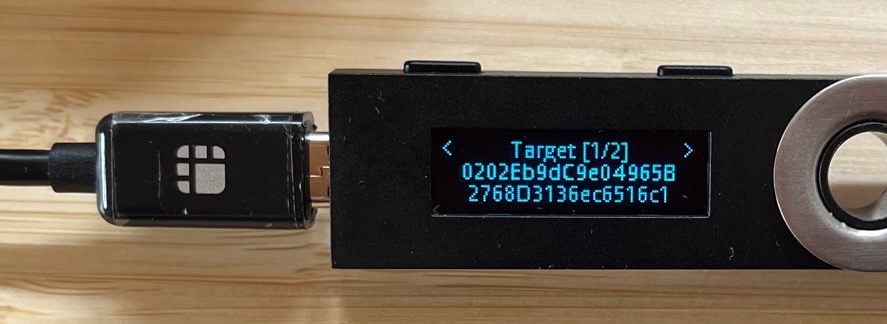
The target value continues on a second screen.
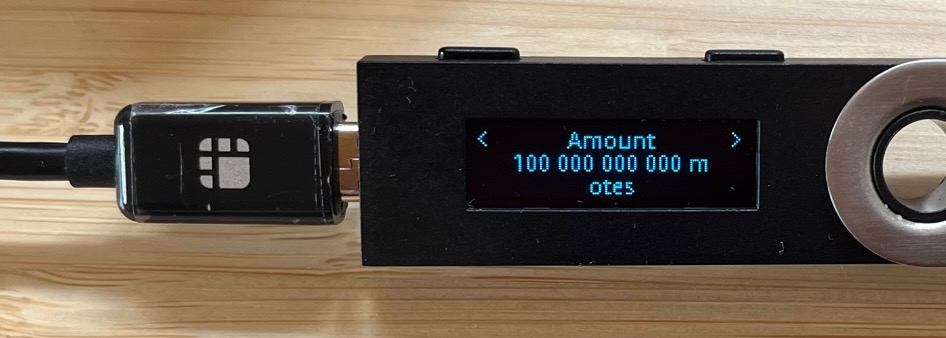
- Verify the amount you want to transfer.
- If you approve the transaction, click both buttons on the Ledger device.
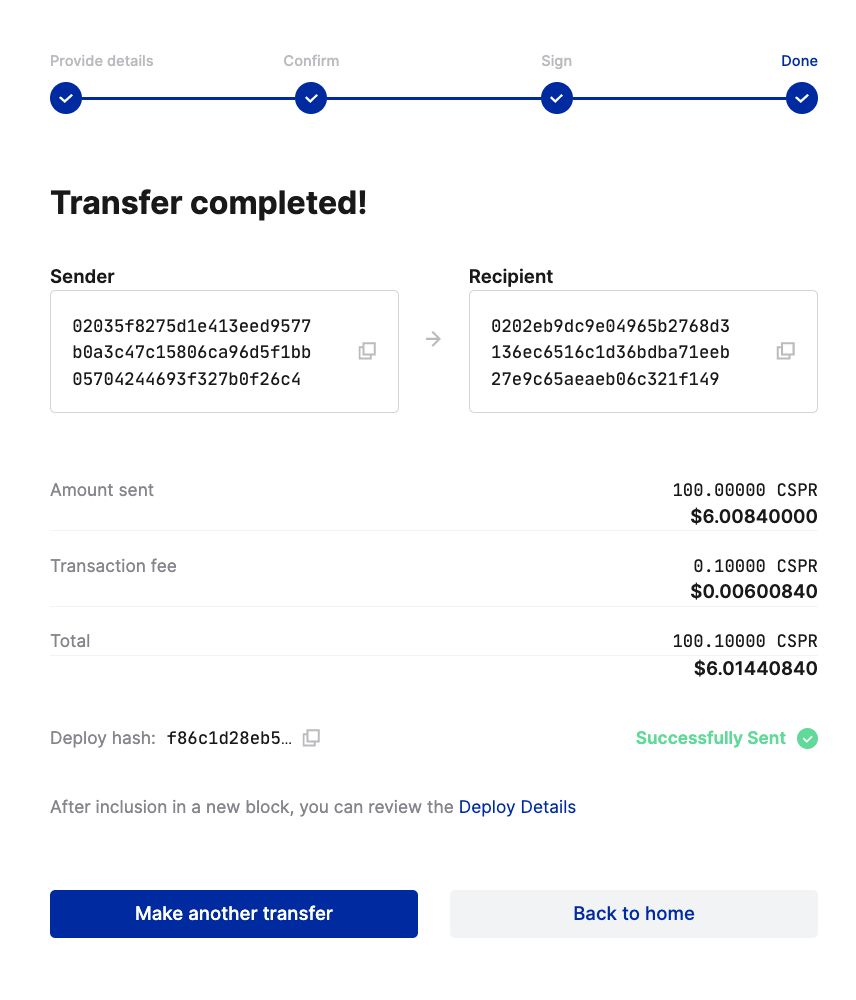
After approving the transaction with your Ledger hardware wallet, the cspr.live block explorer will display a "Transfer completed" page.
You can now check your account to see a list of all the completed transfers.